Williams 1971 Klondike Restoration
Cleaning and Repairing Damage Done by a Mouse
By: Alan Norton
Tucson, Arizona
October 29th, 2017
First Looks
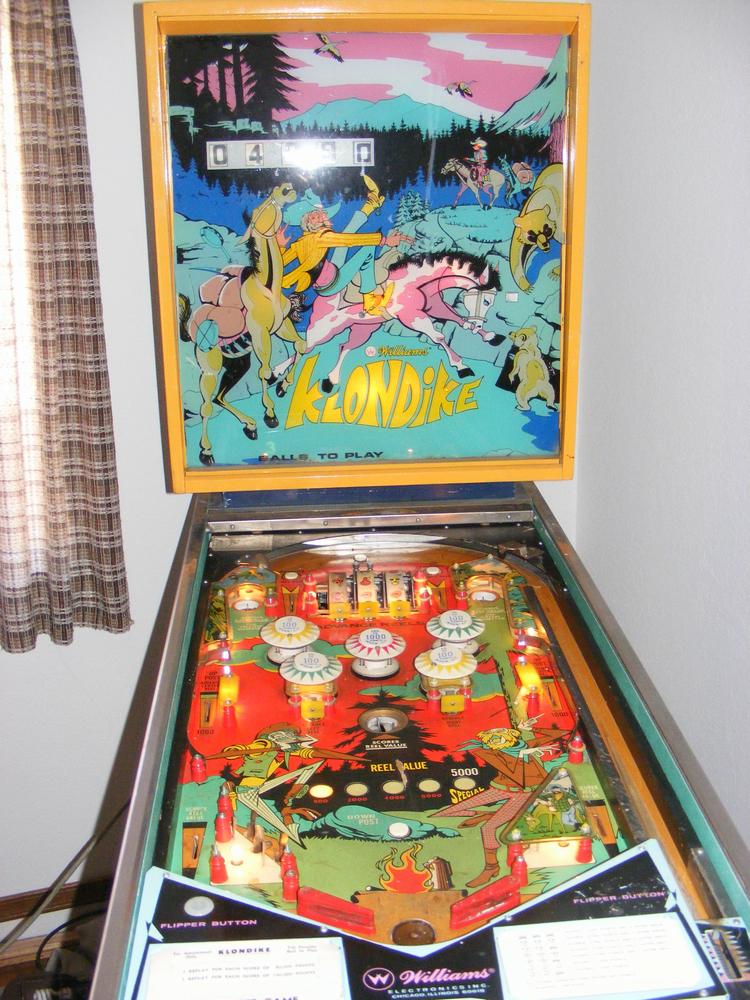
I was contacted a person in Southern California, John - not his real name, who was looking for a Williams Klondike. I had just gotten the machine, but he wanted it because he remembered playing it with his dad when he was young. I really enjoy helping others bring back some of those childhood memories, so I promised the game to him.
I began a 'To Do' list for Klondike. I sent this to John so he knew what I was working on. As I completed a task, I updated the list and put 'DONE' next to it.
- Remove rust from legs, wax and replace leg levelers with new leg levelers. Shine up the leg bolts.
- Check power cord for splices. Replace if necessary. Check wire nuts for missing or loose.
- Remove fuses, one at a time, and check to see if Amperage is correct. Replace if not. Buff with Magic Brush the contact points on the fuse holders and fuses. Pinch fuse holders to tighten if fuses are loose. Replace fuse holders if necessary. Test with a DMM for continuity.
- Clean and adjust all tilts. Pay special attention to the coin door slam tilt and the kick-off tilts on the bottom of the mech board. These are normally closed!
- Check coin door switches for misadjustment. Clean and adjust as necessary.
- Disassemble shooter rod, clean, replace sleeve, replace barrel spring and lightly lubricate with SuperLube. Reassemble and install. These old plastic shooter rod housings are often broken. A new metal one may be needed.
- Remove, clean and insert new nylon solenoid sleeves for the pop bumpers, sling shots and flippers.
- Disassemble and clean the slot-type reels on the playfield. (This should be interesting, never done one of these before).
- Remove mech board and vacuum cabinet - no vacuuming for Klondike due to mouse mess.
- Clean and repaint bottom of cabinet due to mouse mess.
- Dust off mech board. Due to mouse mess, sand mech board and clear coat.
- Clean and adjust all switches on mech board.
- Shine all screw heads, washers and metal parts.
- Disassemble score motor and clean cam and brackets.
- Clean and adjust all switches on score motor.
- Clean and adjust all switches under the playfield.
- Replace all playfield insert lamps with new #44 lamps.
- Replace all playfield general illumination (GI) lamps with new #47 lamps.
- Replace five pop bumper lamps with new #47 lamps.
- Clean playfield and wax with Carnauba.
- Clean all playfield parts - flipper bats, posts, plastics, aprons etc.
- New rubber rings on playfield.
- Disassemble and clean all stepper units - Credit Unit, Player Unit, Match Unit.
- Disassemble and clean all parts for each score reel (four total).
- Adjust and clean score reel switches.
- Clean and adjust all switches in the backbox.
- Clean wooden chime box. Parts missing. Will need to order new parts.
- Replace all backbox lamps with new #47 lamps.
- Coat backglass with Triple Thick to prevent further flaking.
- Clean outside of cabinet with blue window cleaner.
- New locks on coin door and backbox door.
- Glue bottom cabinet panel back onto cabinet.
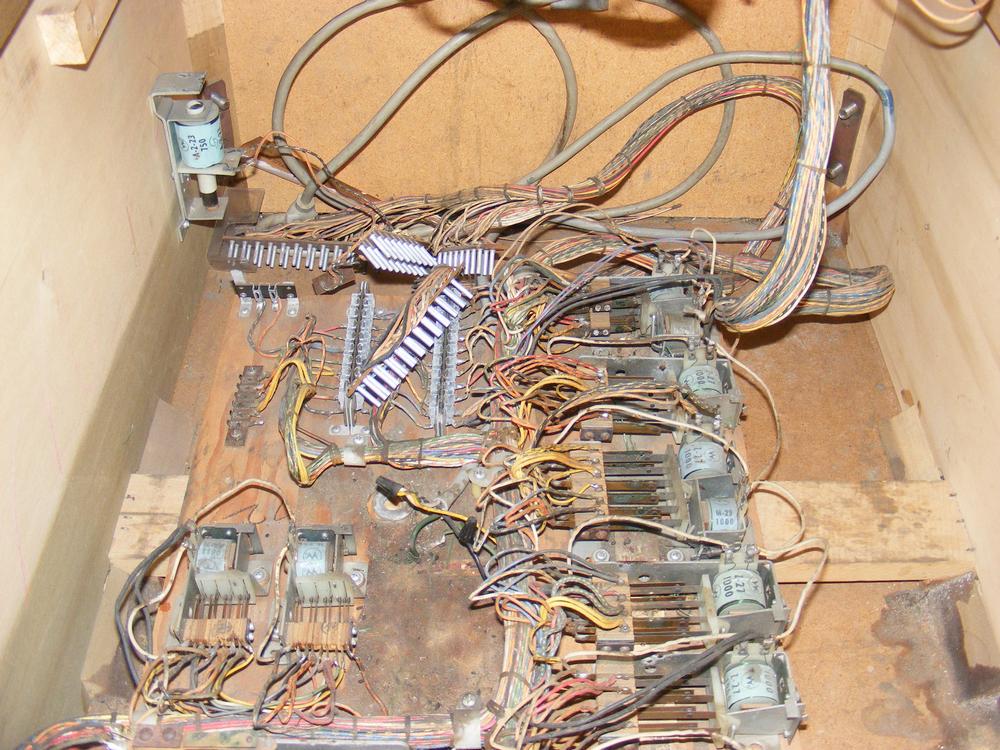
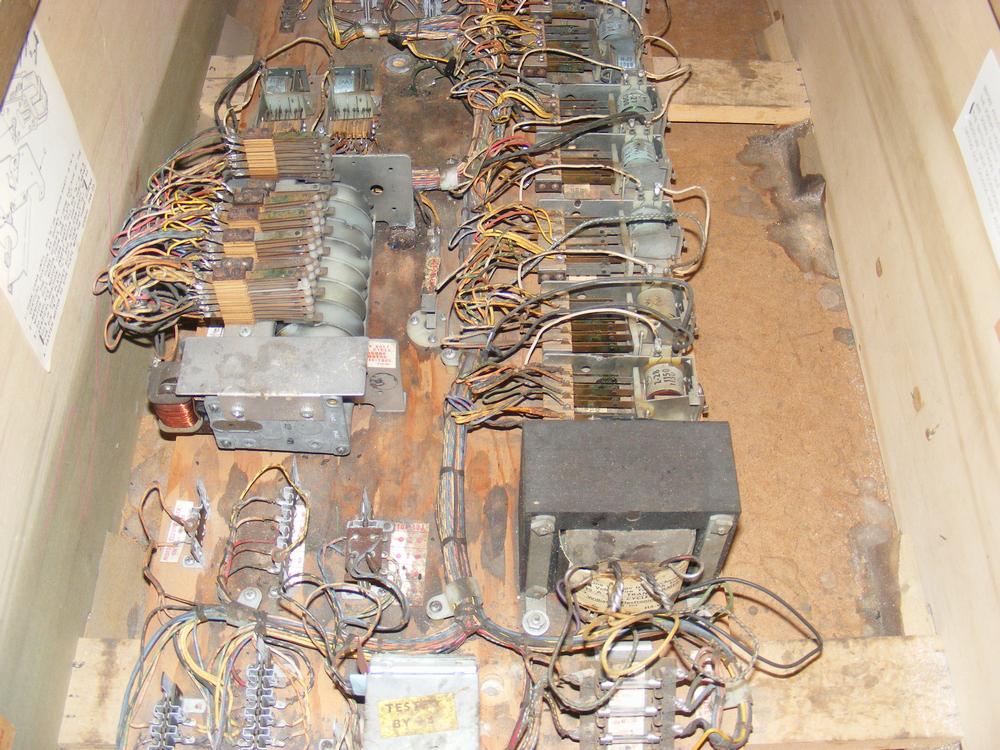
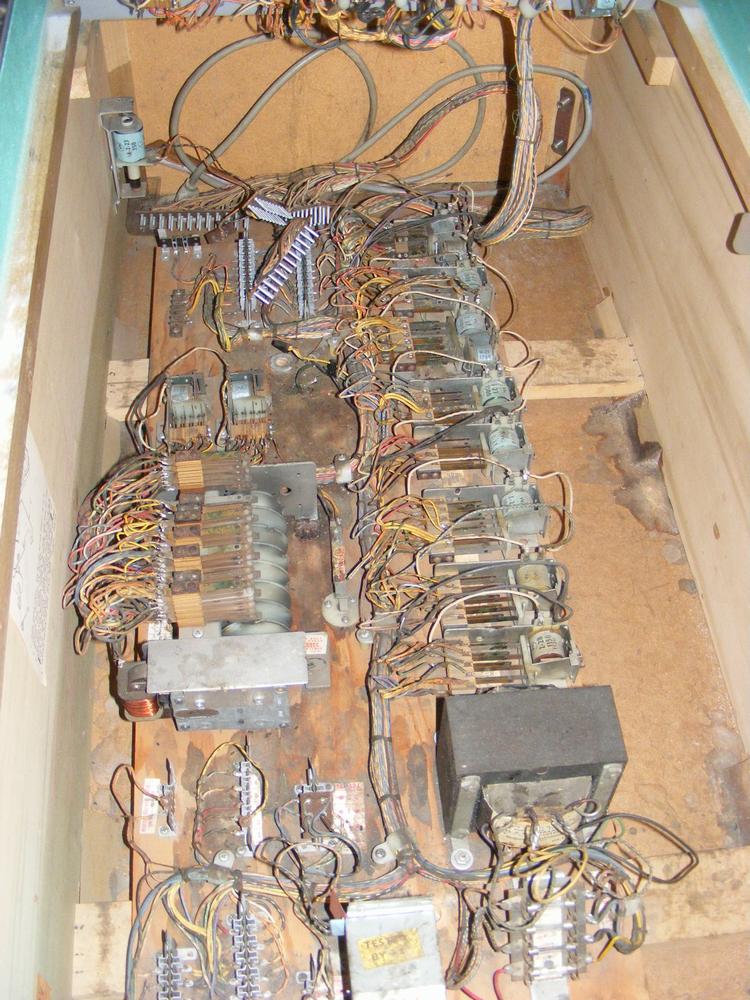
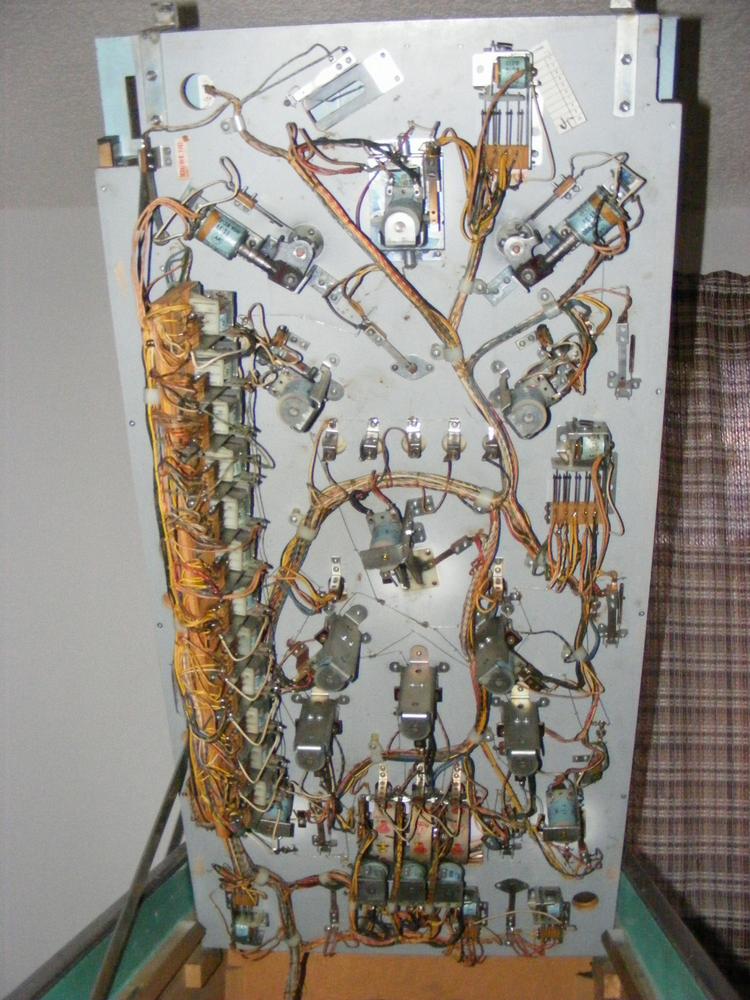
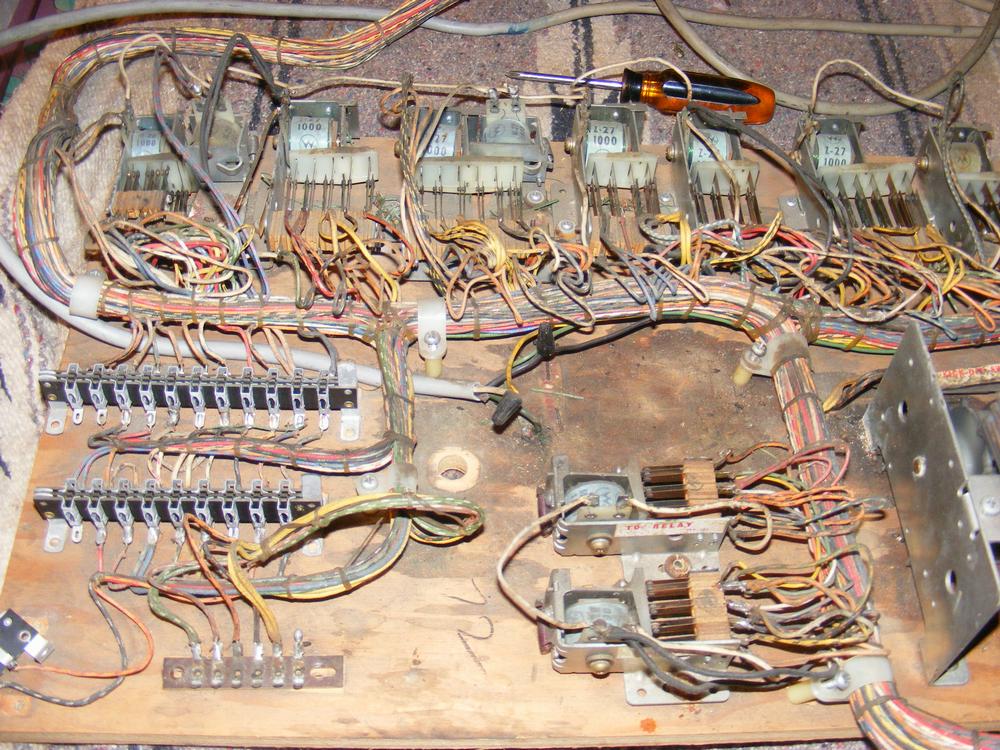
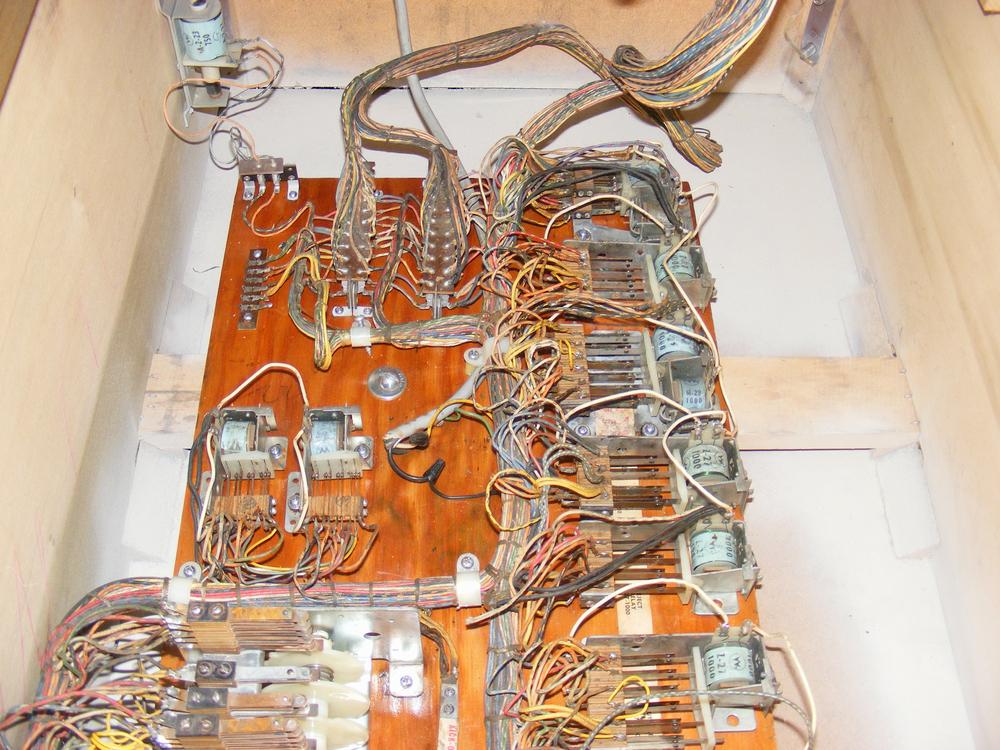
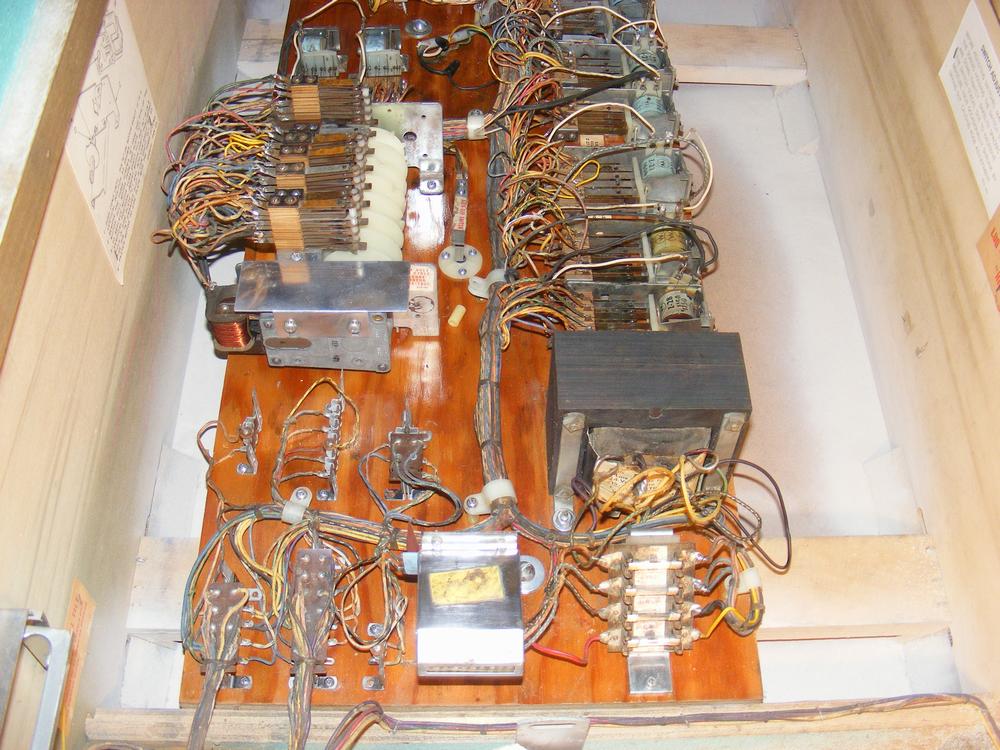
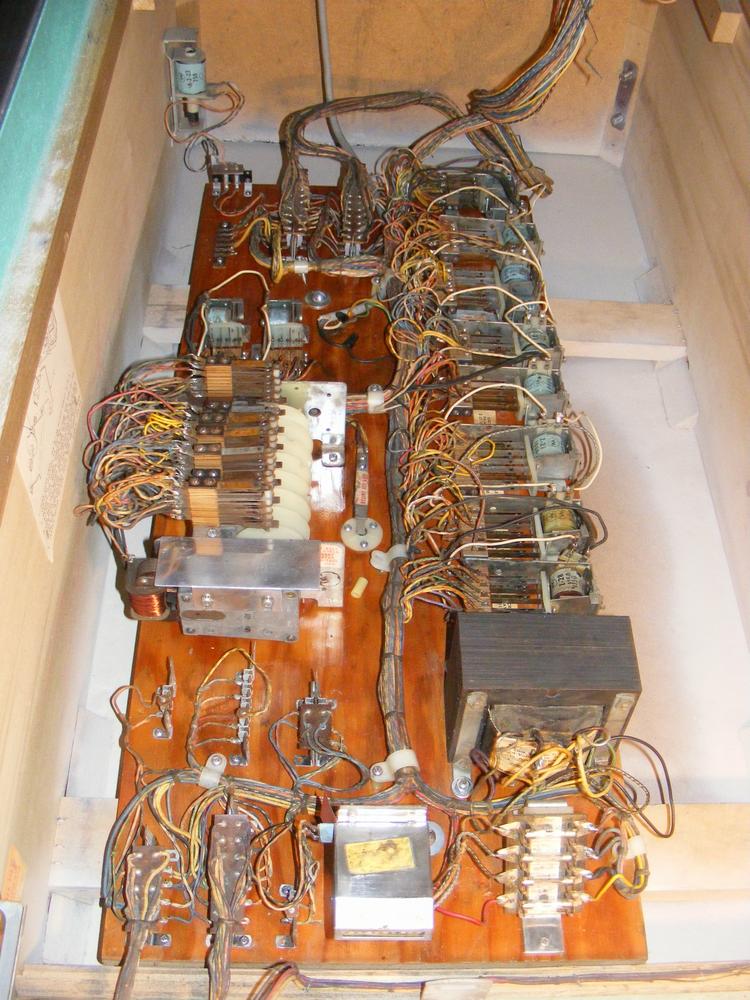
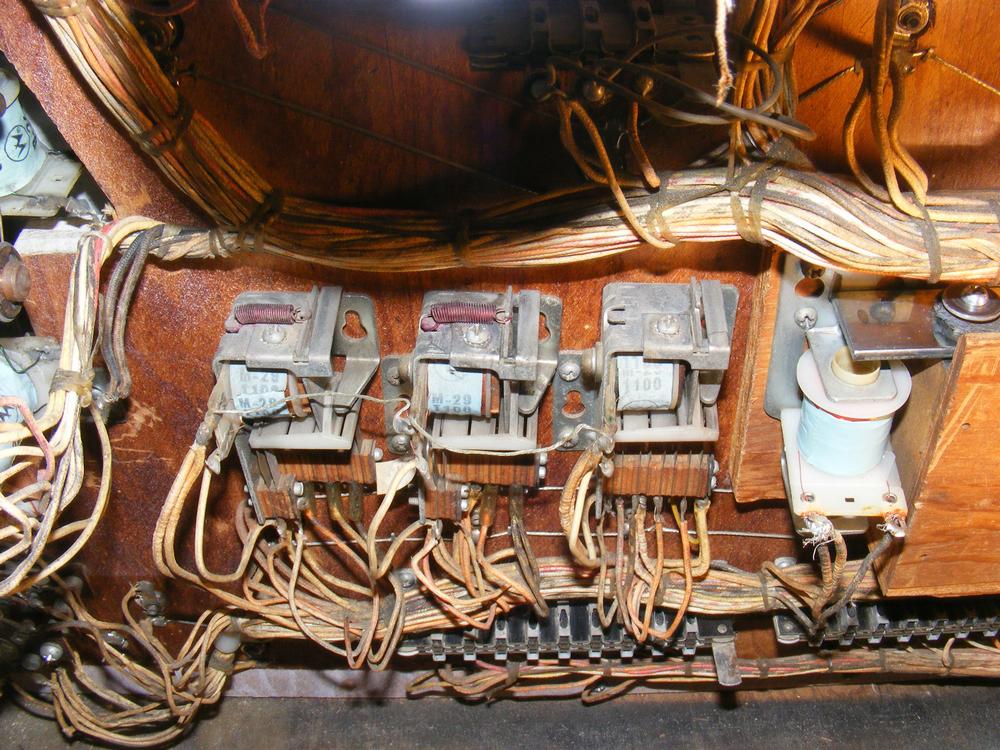
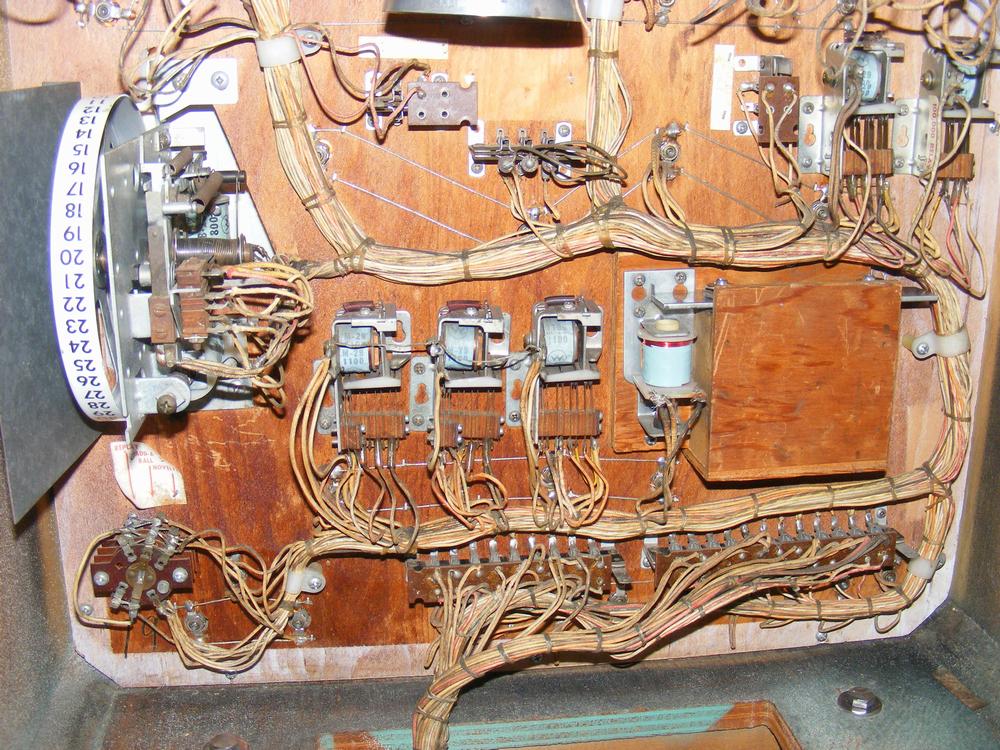
Here are some pics of the mech board. As you can see, the mech board is pretty filthy. This is typical for a Williams EM from this era. One of the options I offered John was to remove all of the mechs, sand down the mech board, clear coat the mech board or paint it the color of your choice and replace the mechs. If you look closely, you will see some stains on the mech board and cabinet. Most of this is from grit and grime but there was also a mouse in this machine. It was bad enough that the 'option' to sand and clear coat the mech board would now be a necessity.
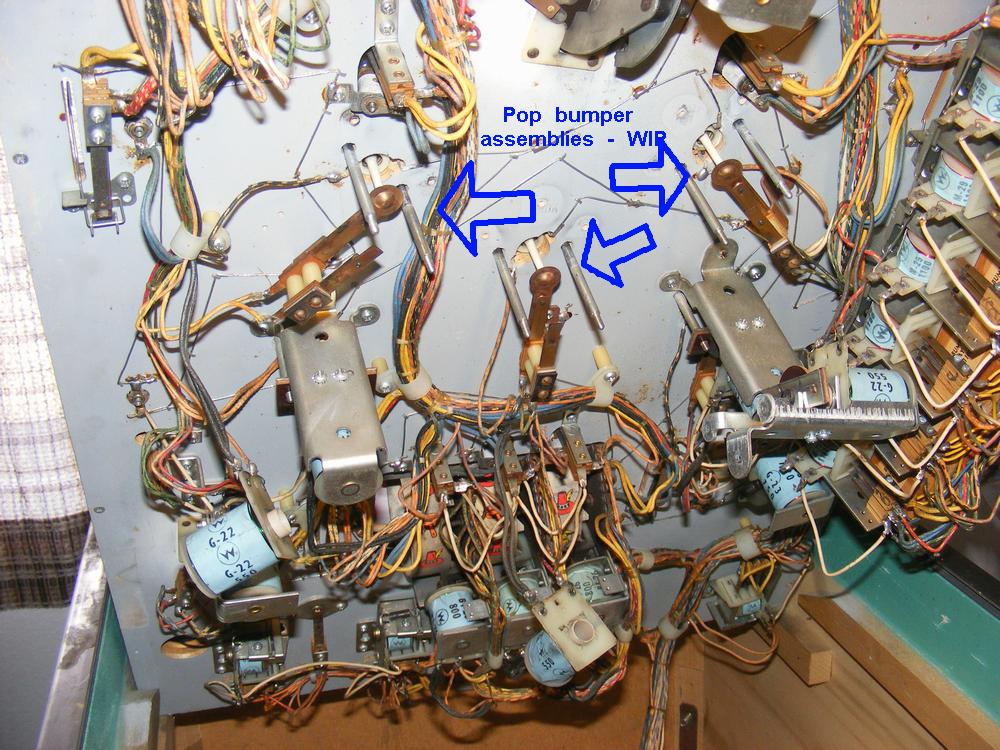
Here are some before pics of the underside of the playfield. No problems here that I can see. I have already taken apart the five pop bumpers, cleaned them and adjusted the switches, reassembled and reinstalled.
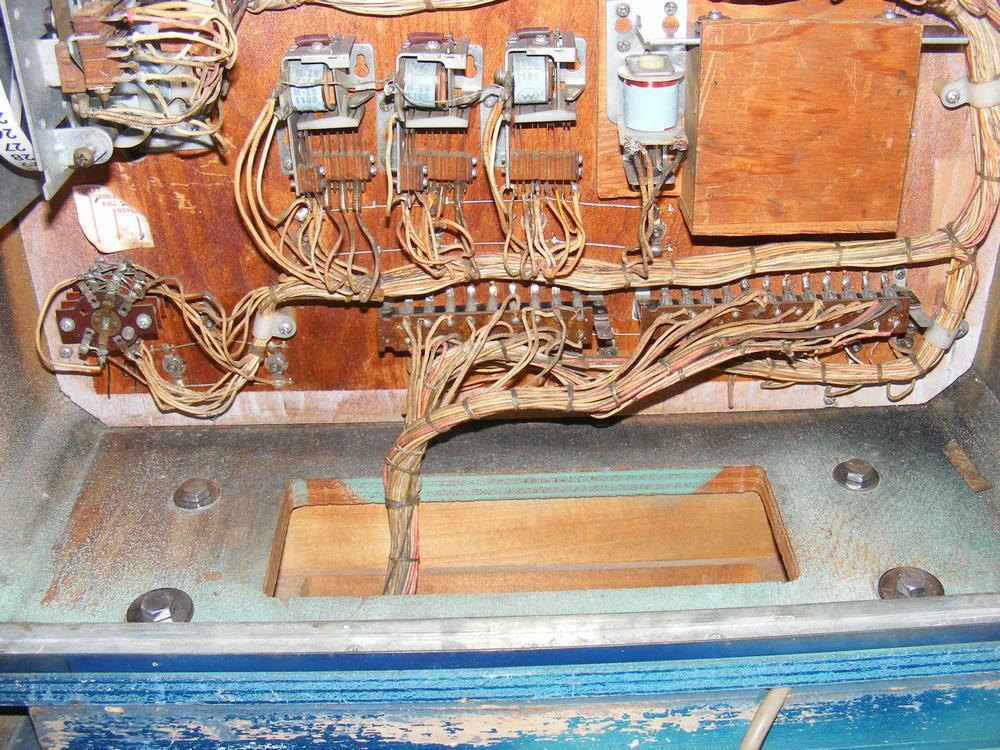
Mech board removed. There are only a few mouse turds in the cabinet. I consider myself lucky, it have been a lot worse.
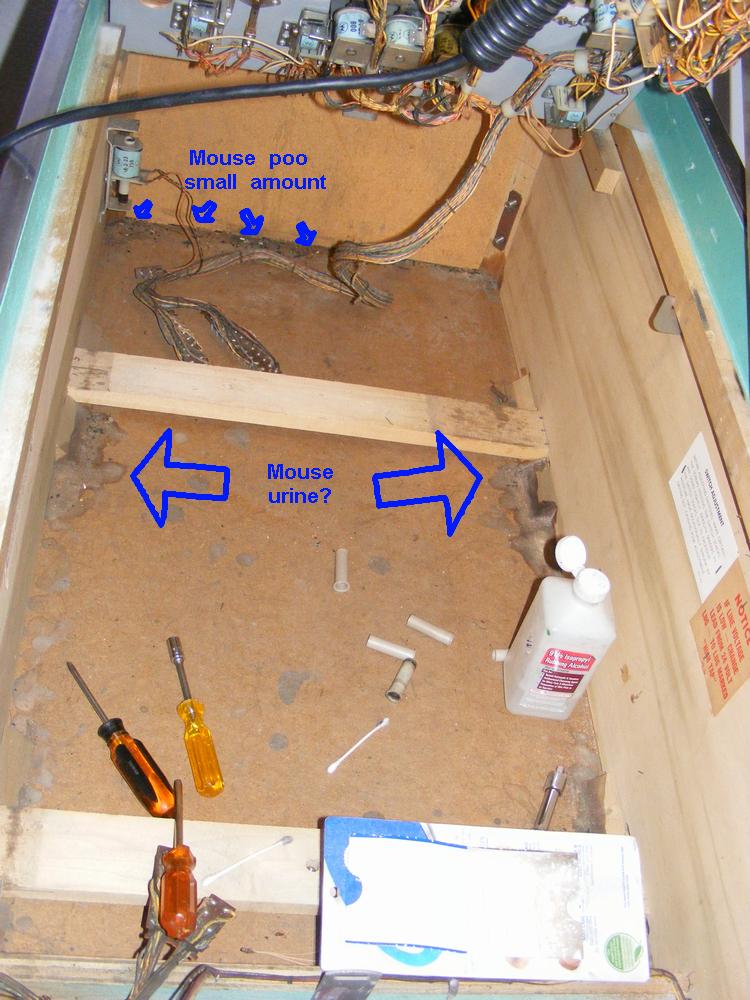
The Long Process Begins
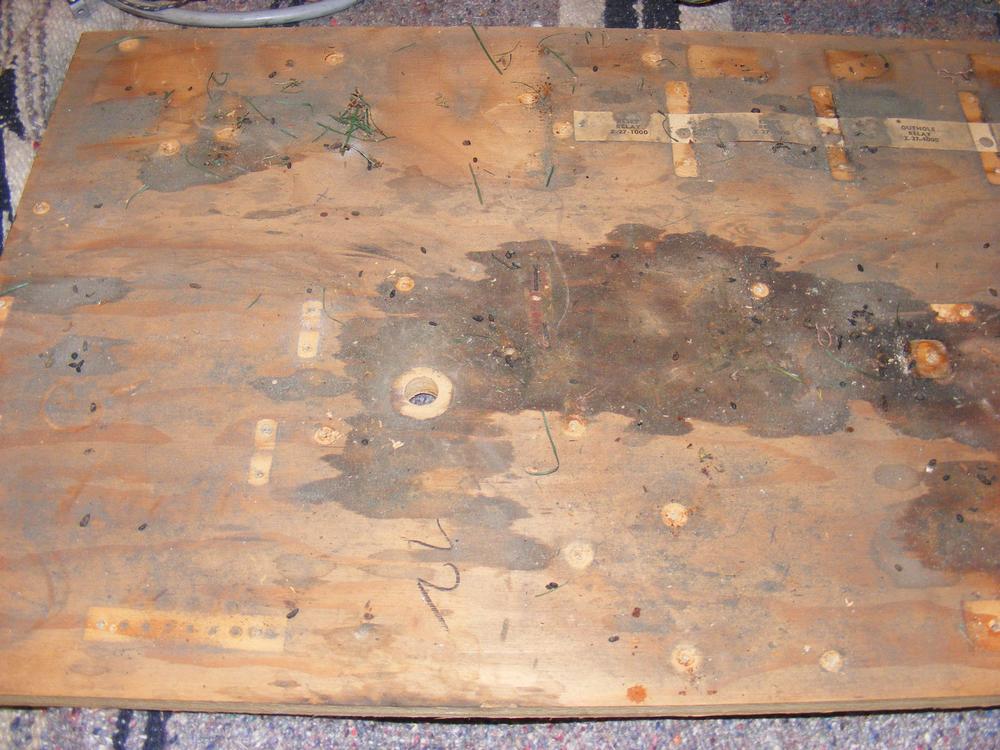
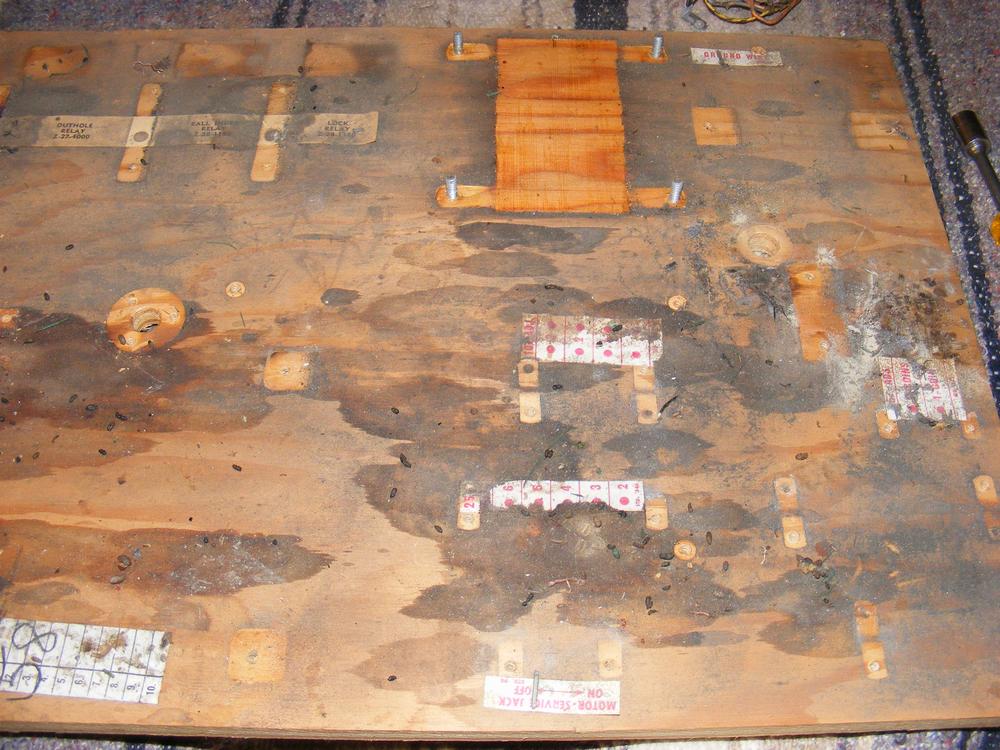
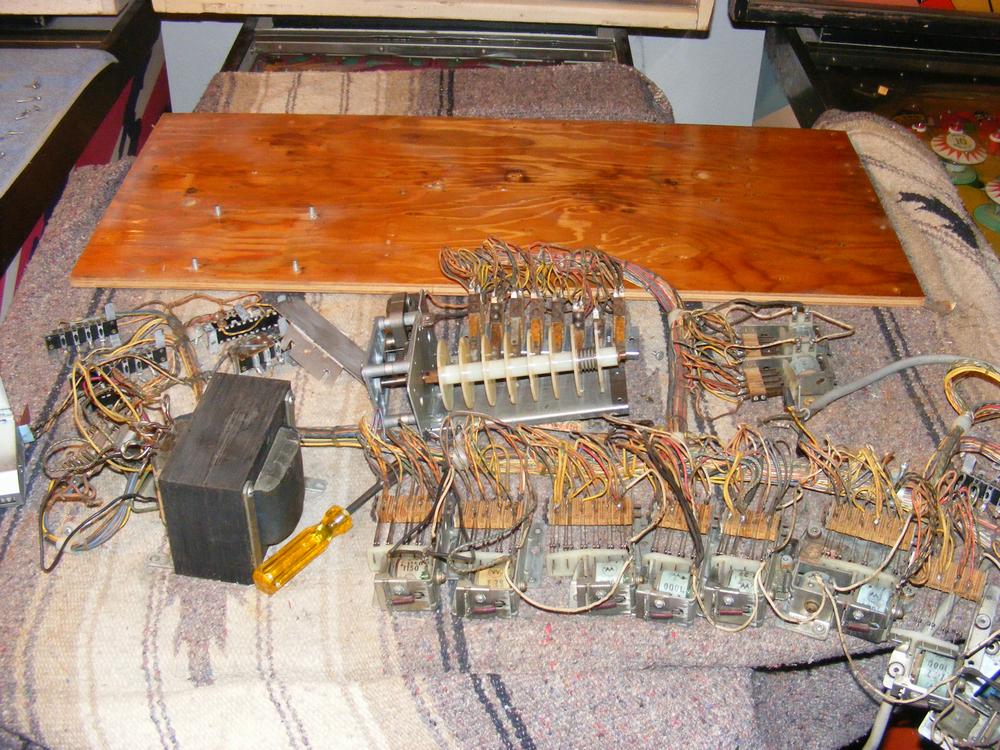
It's not fun removing all of the mechs on the mech board, but in this case it had to be done. Not only had the mouse made a mess in the cabinet, there was a mess on the mech board.
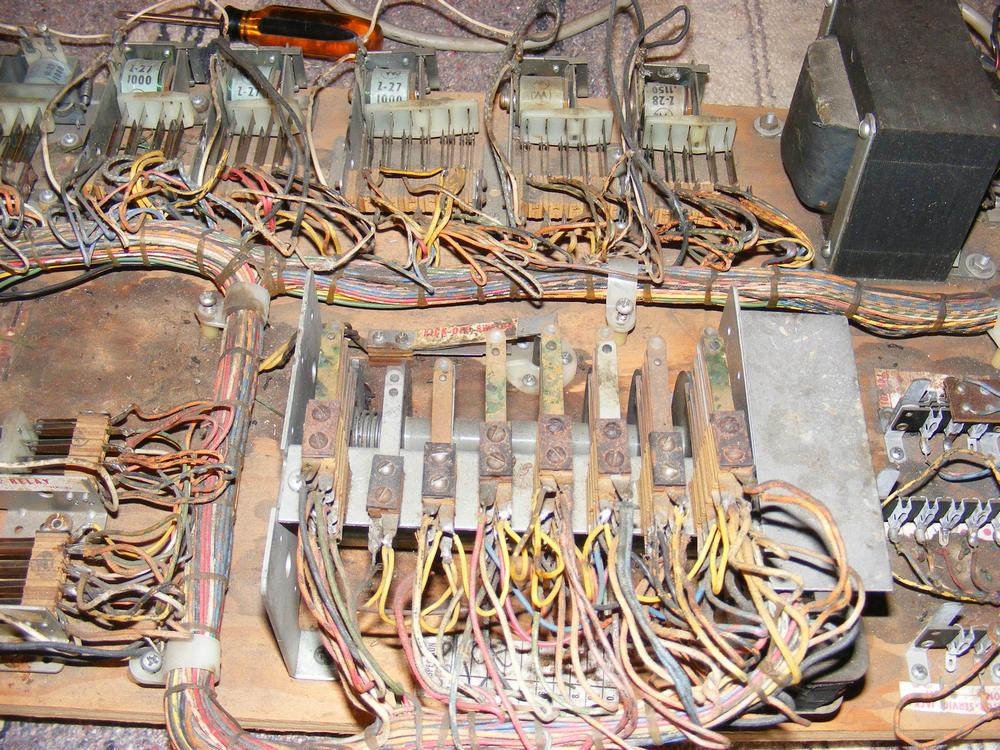
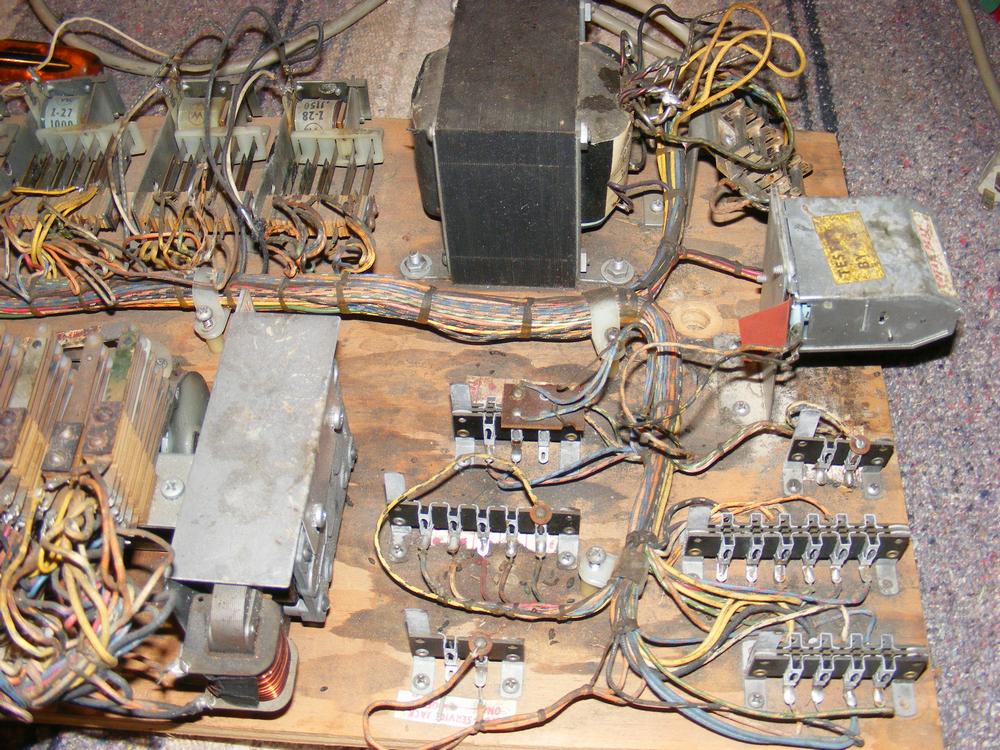
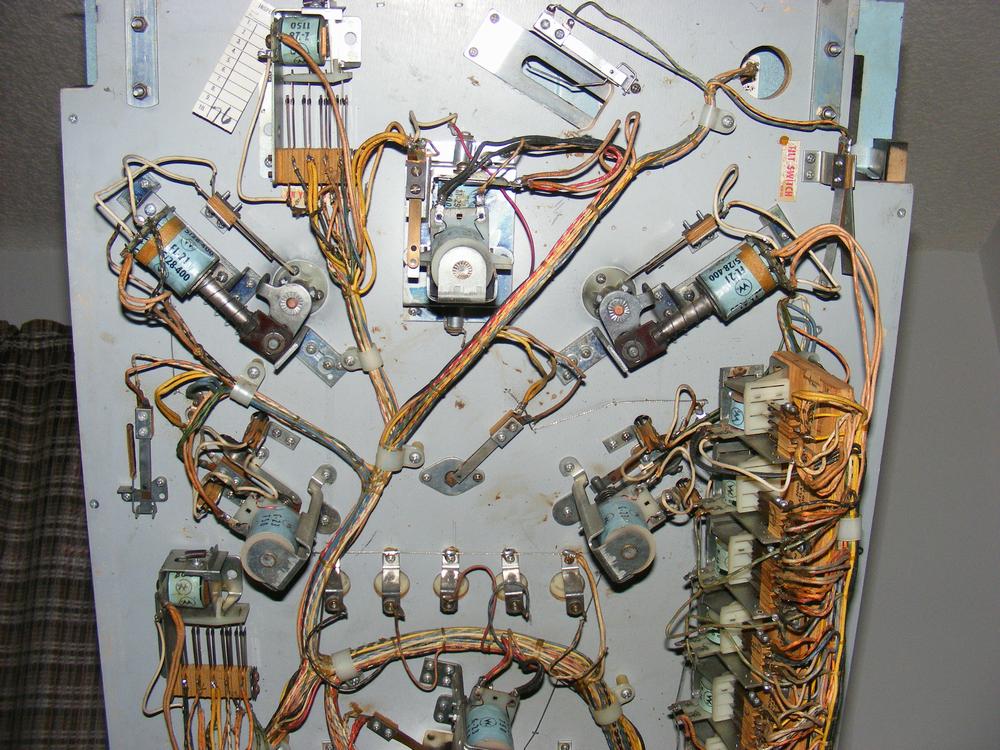
After the mechs were removed, the full scale of the damage can be seen, turds and all.
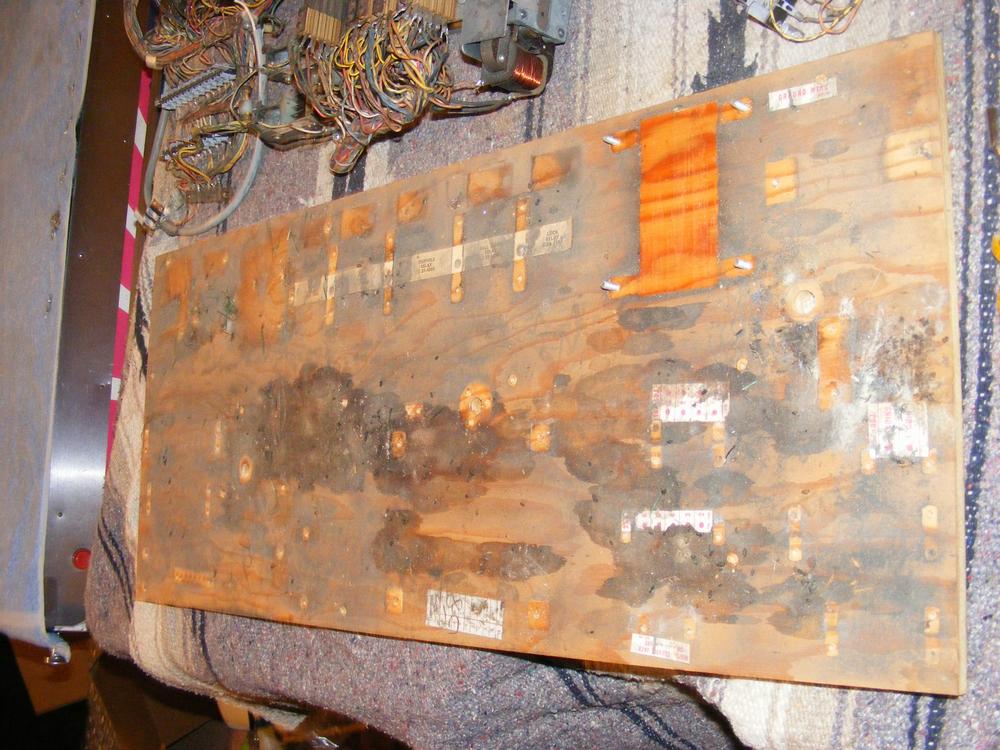
Then the mech board had to be sanded down. Unfortunately, I knew I would not be able to completely sand out the urine stains. Normally, I sand down the board with the option to clear coat. I didn't think this would work with this much staining. I recommend to the buyer a couple coats of paint in the color of his choice. A couple coats of paint would not only hide the stains, but wold also lock in any smells. If this mouse had the Hanta Virus I'm a dead pinballer! Not likely, but Hanta Virus is lurking out there somewhere just waiting for someone to breathe it in. :-)
After a lot of sanding I was surprised to see the mech board looking pretty darned nice. Enough of the mouse stains had been removed that I could clear coat it. The buyer decided this was what he wanted, so, clear coat it was.
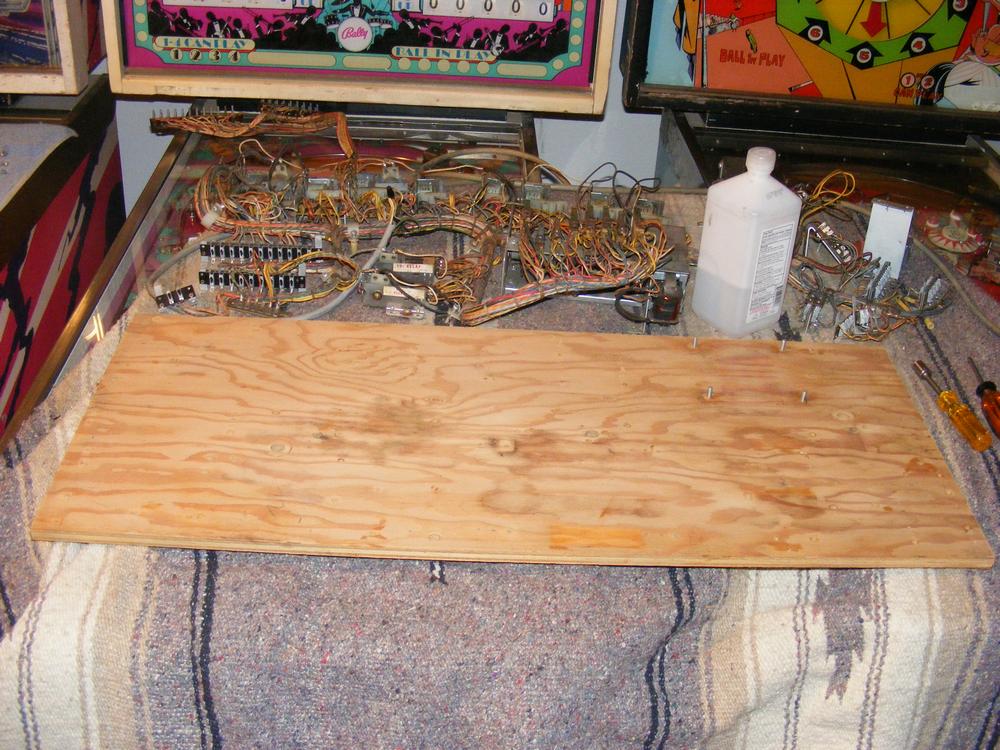
Some of the mouse stained still showed after the clear but it wouldn't be that noticeable once the mechs were back on the board.
Now came the long process of cleaning all of the relays, switches and contacts. I use 91% Isopropyl alcohol to clean every square inch of the relays. Then I used 'The Magic Brush' treatment to remove any oxidation of the switch contacts. I used to think that a simple Isopropyl alcohol cleaning was enough, but I am now convinced that each and every contact should either be cleaned with 500 grit sandpaper or The Magic Brush. This is the first Project Pin that I have used the Magic Brush treatment on. It's not perfect, some contacts are hard to get too, but the results are excellent.
I have heard a lot of good things about Mothers Mag Wheel Polisher and I picked up a can at a local auto parts store. I used it to clean the score motor metal cover and it shined up really good. Each screw head was polished by hand using it. You can see for yourself how nicely it turned out.
Shine all screw heads, washers and metal parts.
The mech board is back in the cabinet. Note that the bottom of the cabinet has been spray painted with Krylon Almond. Looking good!
Clean and adjust all switches under the playfield.
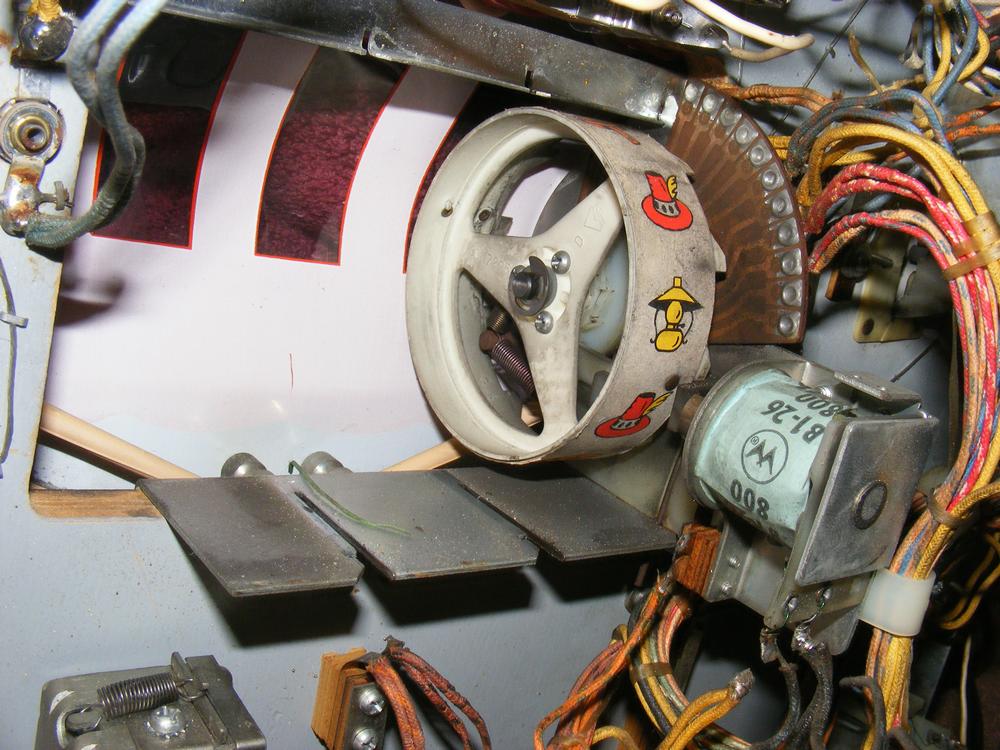
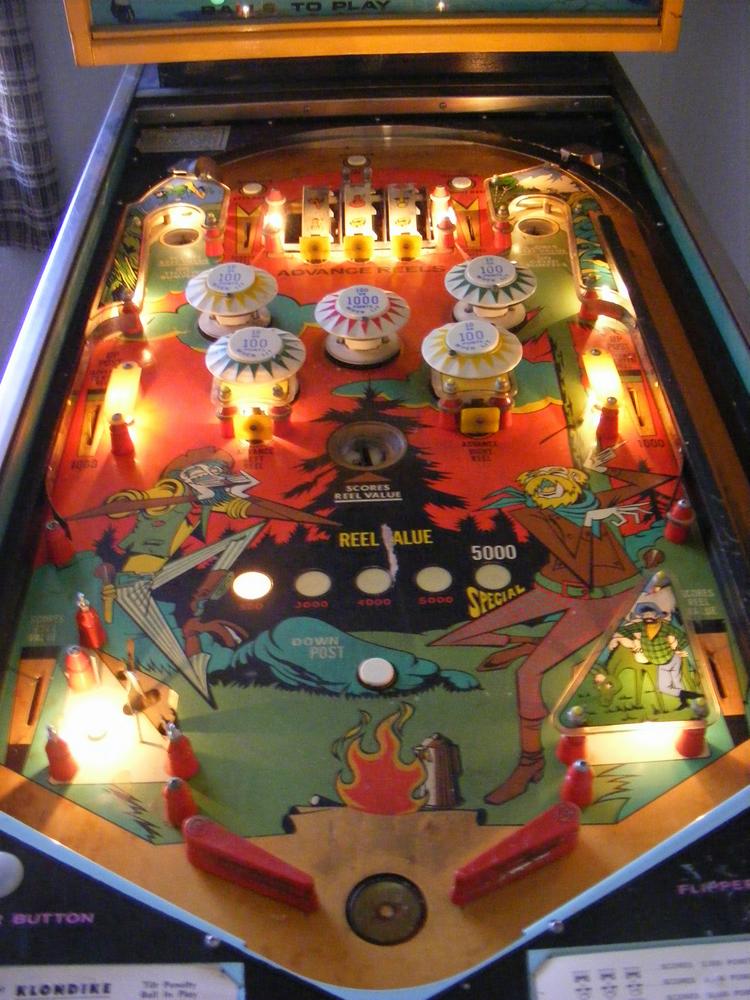
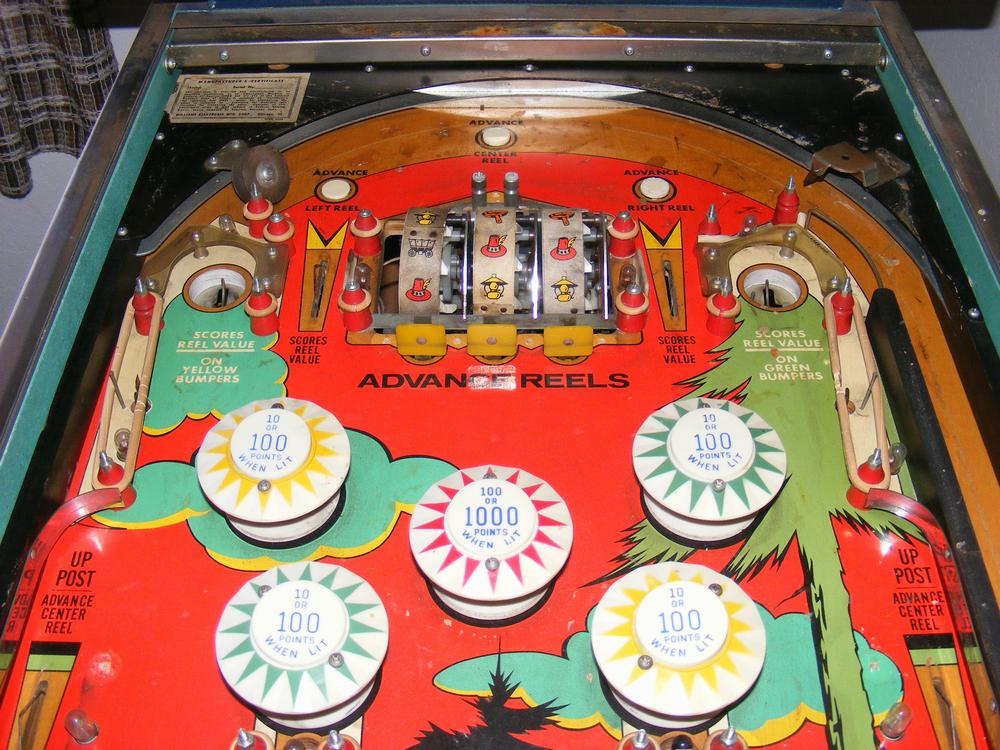
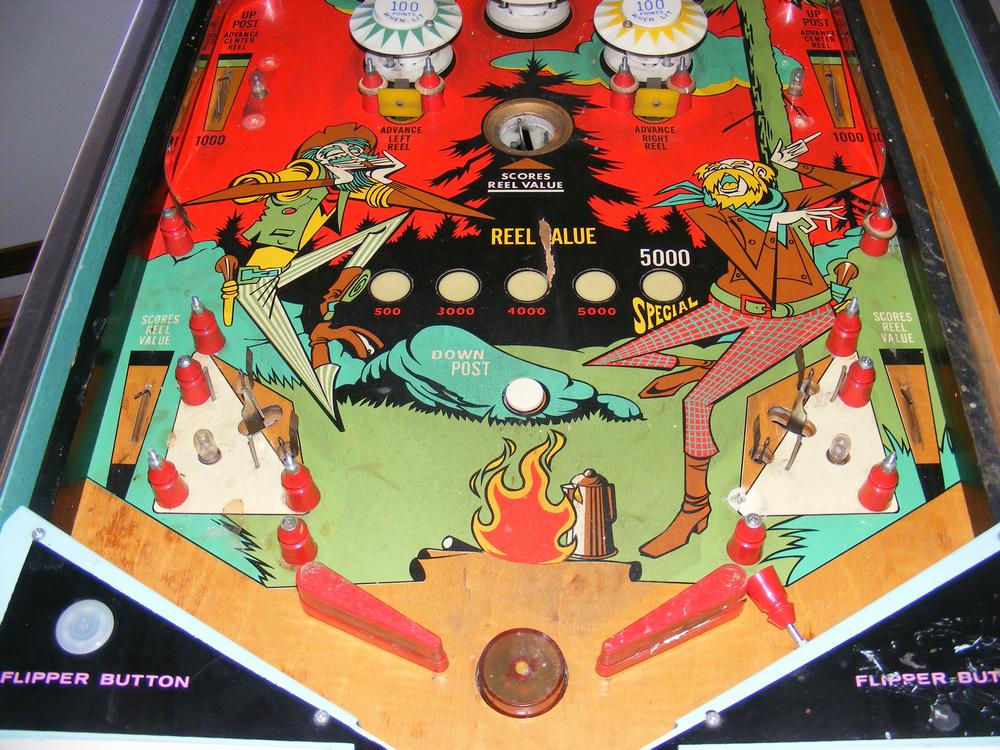
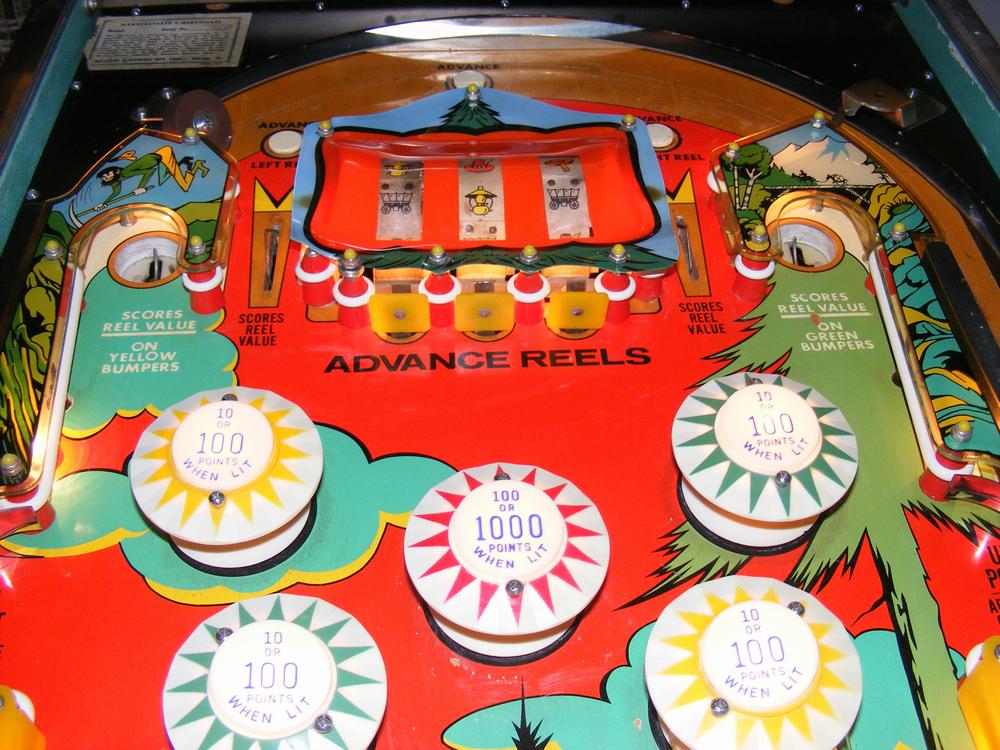
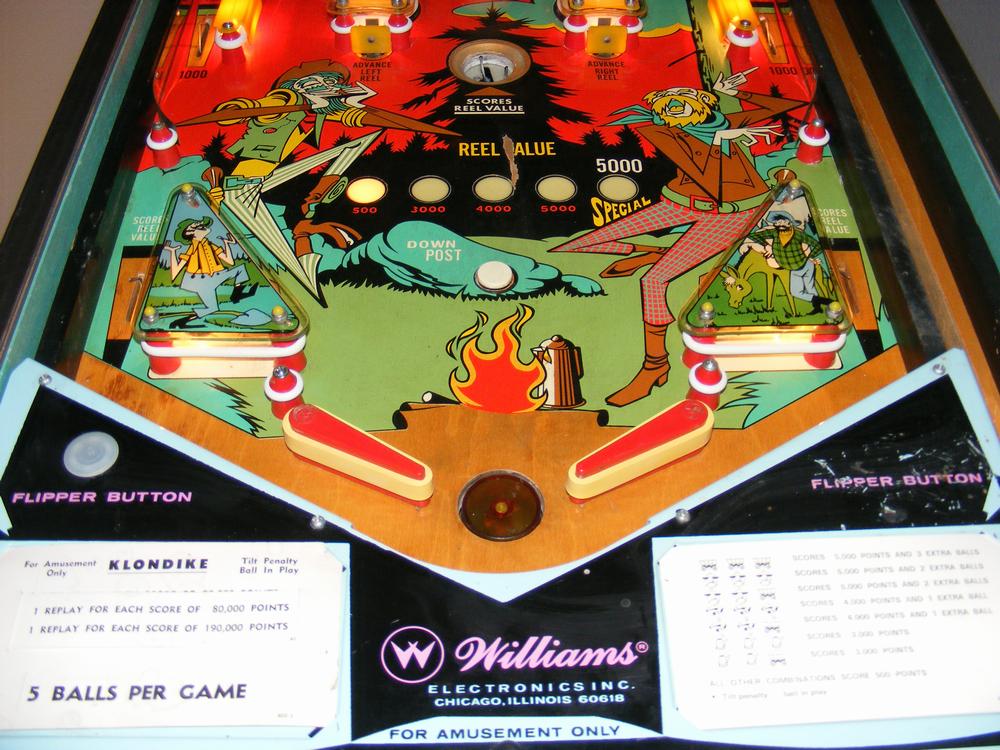
One of the unique features of Klondike, and it's sister Yukon is the three slot-like reels on the upper playfield. They don't spin like on a regular slot machine, instead each reel moves one step at a time. Which reel moves depends on which target is hit. I've never done one of these so I thought it would be a challenge. It turns out that they use the standard score reel assembly with pictures on the reels instead of numbers.
Each slot reel assembly slides out for easier access.
I found a number of problems as I began taking the slot reels apart.
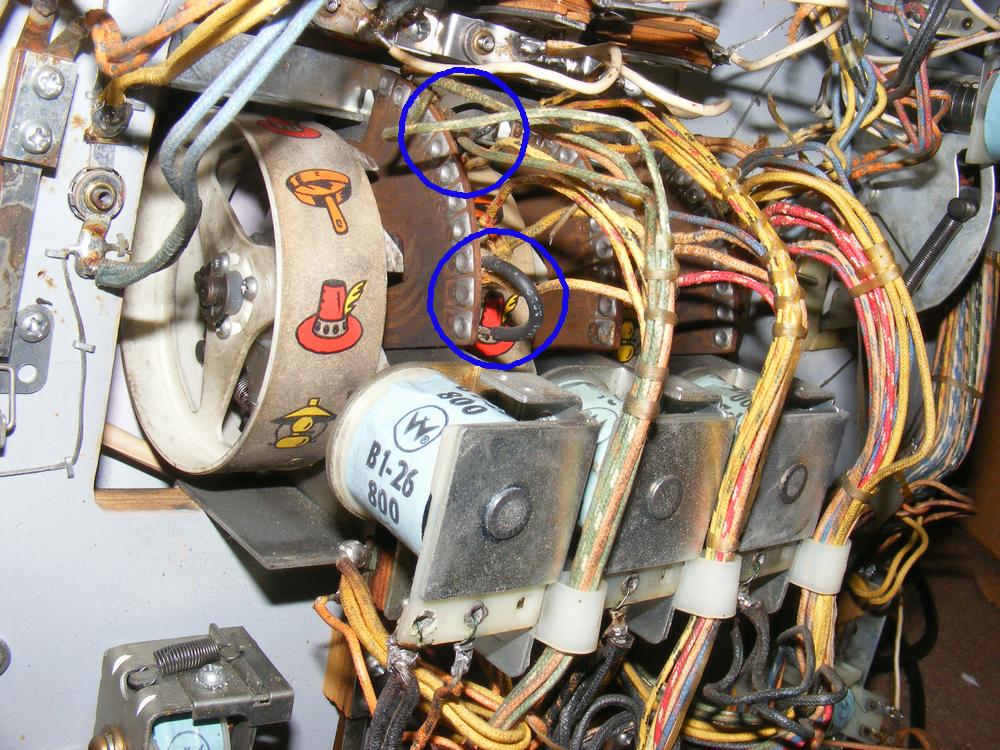
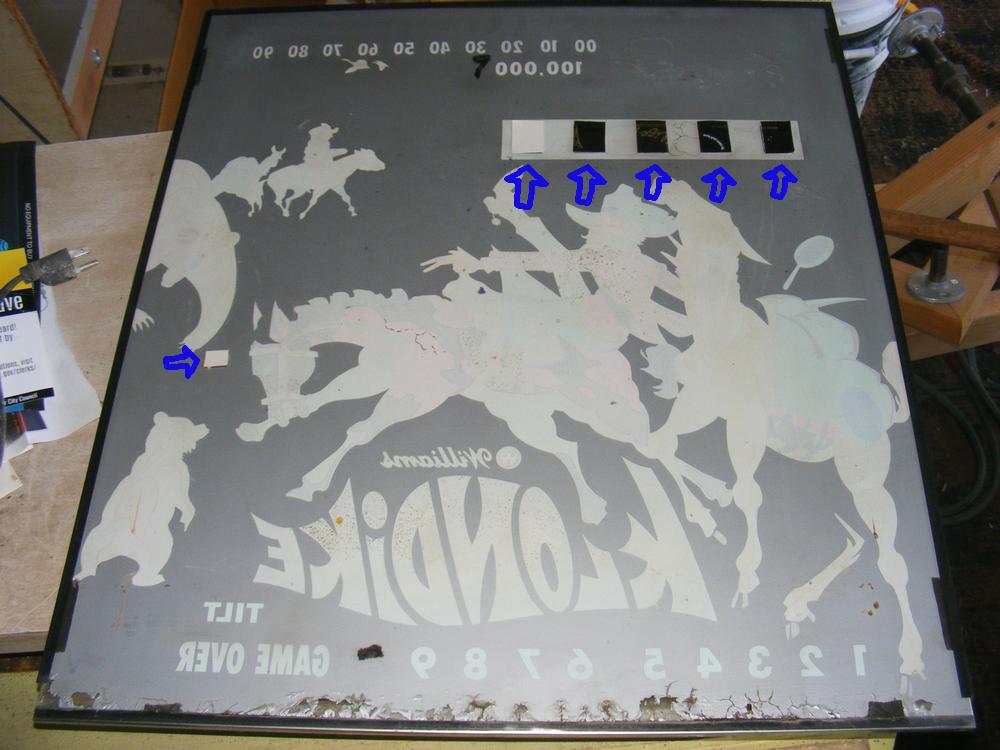
The blue circles show two jumpers that are soldered on the back side of the PCB. Problem was, in this case, one of the jumpers came off in my hand when I removed the slot reel assembly.
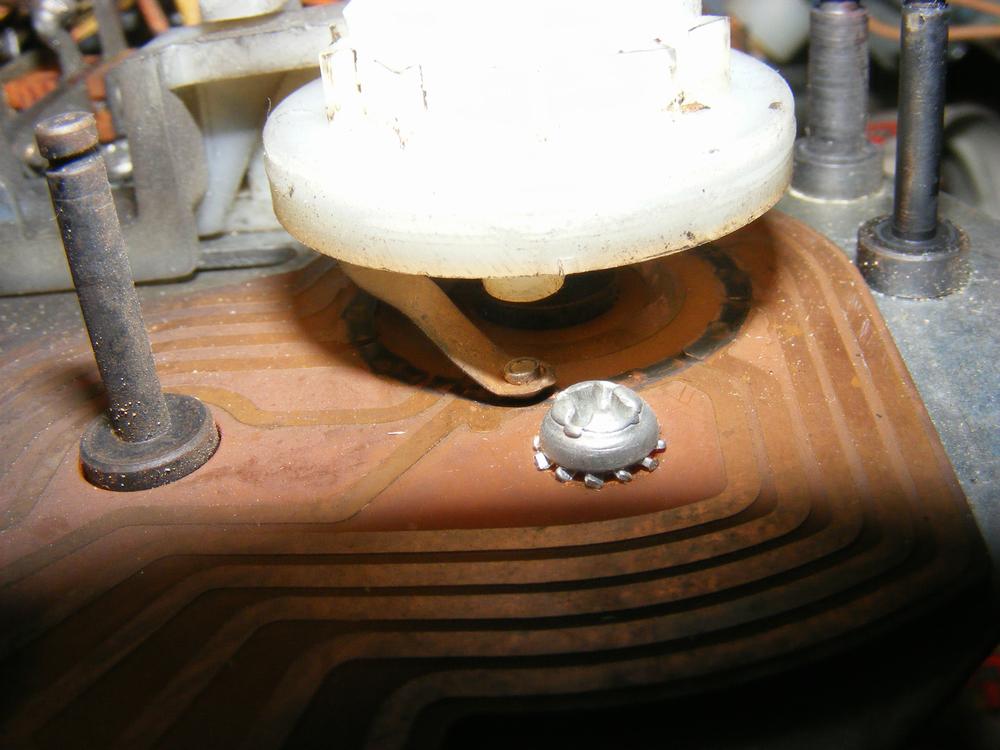
The plastic, nylon parts, springs and E-clips are removed from the slot reel assembly. These parts are cleaned with dishwashing detergent, Bon Ami and water. Every square inch of the assembly is cleaned with Isopropyl alcohol. The metal posts are given extra attention as these need to be clean for smooth operation.
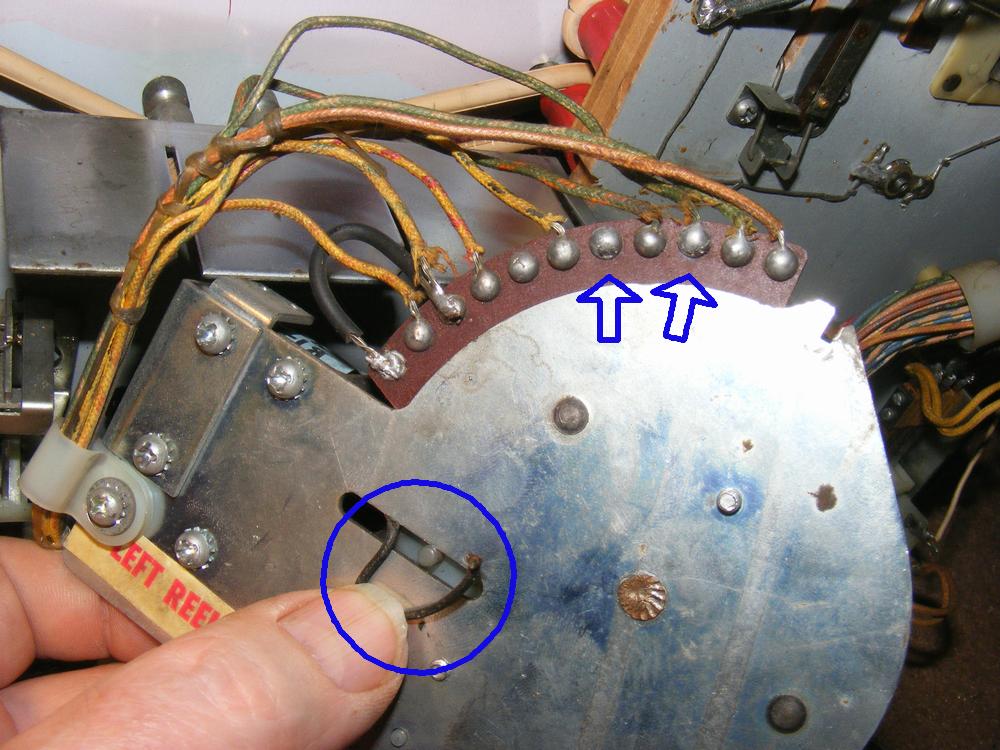
A copper horseshoe switch rides on the PCBs copper traces. It is important to clean the copper traces with The Magic Brush.
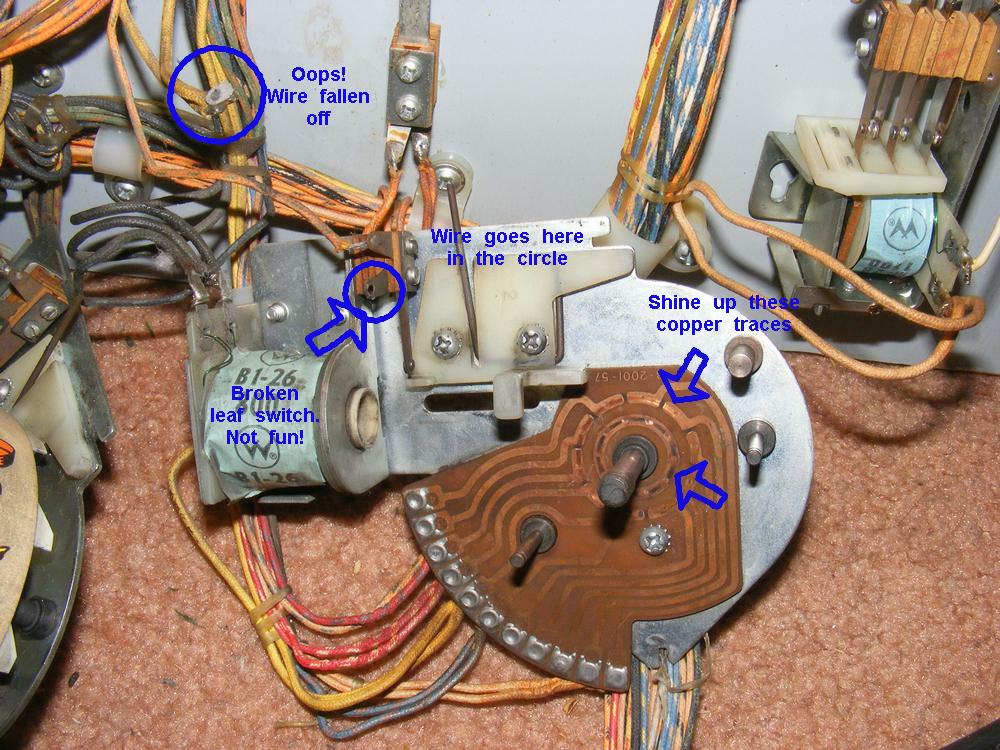
There are two problems in the above picture. One of the switches has broken off and one of the wires has fallen off. A broken switch is not something I enjoy fixing. Fortunately, this is a small switch stack, but even so I had problems getting the leaf switches and bakelite spacers off the guides.
Disassemble and clean all stepper units - Credit Unit, Player Unit, Match Unit. DONE
Disassemble and clean all parts for each score reel (four total). DONE
Adjust and clean score reel switches. DONE
Clean and adjust all switches in the backbox. DONE
Clean wooden chime box. Parts missing. Will need to order new parts. DONE - parts scavanged from Suspense backbox.
Here are some pics of the backbox after the above steps were completed.
Let's play the game 'What's Wrong With This Picture' or if you prefer 'One Thing Is Different From the Other.' Take a closer look at the above picture and try to play along.
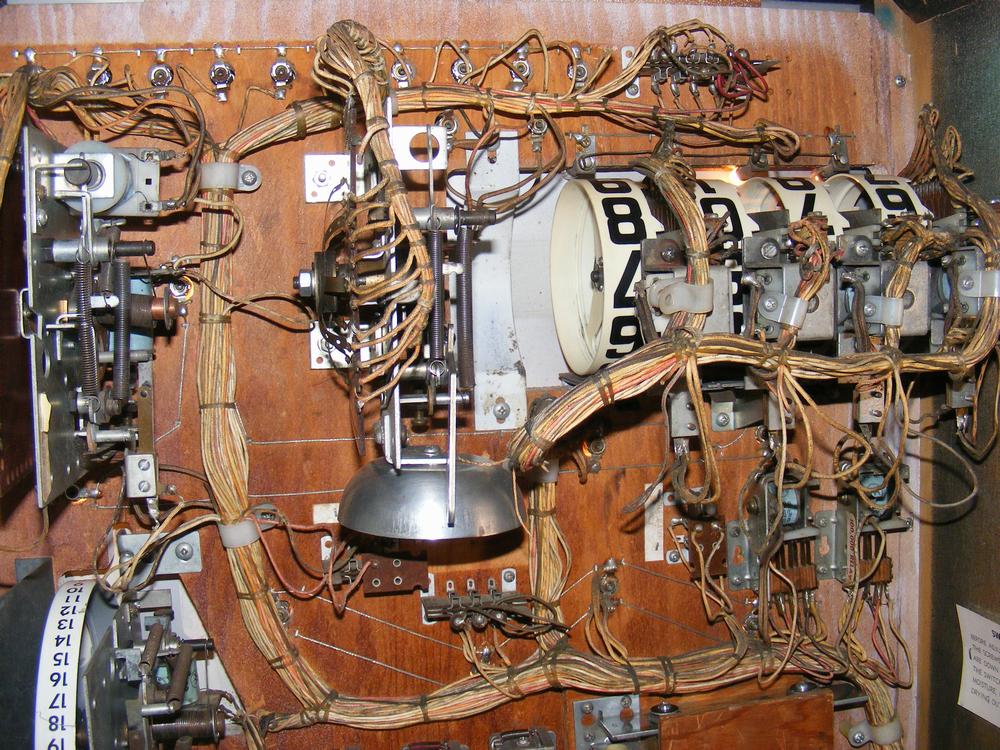
Just look at that shiny bell and gleaming white score reels. These were the dirtiest score reels I have ever seen. It took a lot of scrubbing, on the inside of the score reels, to clean them up. It was as if the dirt was baked on. Never scrub the outer side of the reels! The numbers can come off.
Have you found the missing piece? It's fixed in this picture!
With the backbox back where it belongs, Klondike is coming back together!
With the backbox back on, it was time to reconnect the Jones plugs, plug the main power cord into the wall outlet and turn on the machine. Success! Kondike was coming back to life! The lights were on!

Now it was time to press the start button and press my luck. Would it fire up? Nope. It took me less than a minute to find and remember the loose wire to the credit unit that I had forgotten to solder back in place. Back to the start button. Would it fire up? YES!! After all of that work I did, Klondike reset properly, added 5 balls properly, kicked out the ball properly and was ready for play!! I went through most of the features on the playfield and they all seemed to be working as they should. What a great feeling to know that my hard work had paid off. The only problem I found was a weak right flipper. I may find other problems, but it is quite a feat, if I do say so myself, to get a Project Pinball working in less than one minute after reassembly.
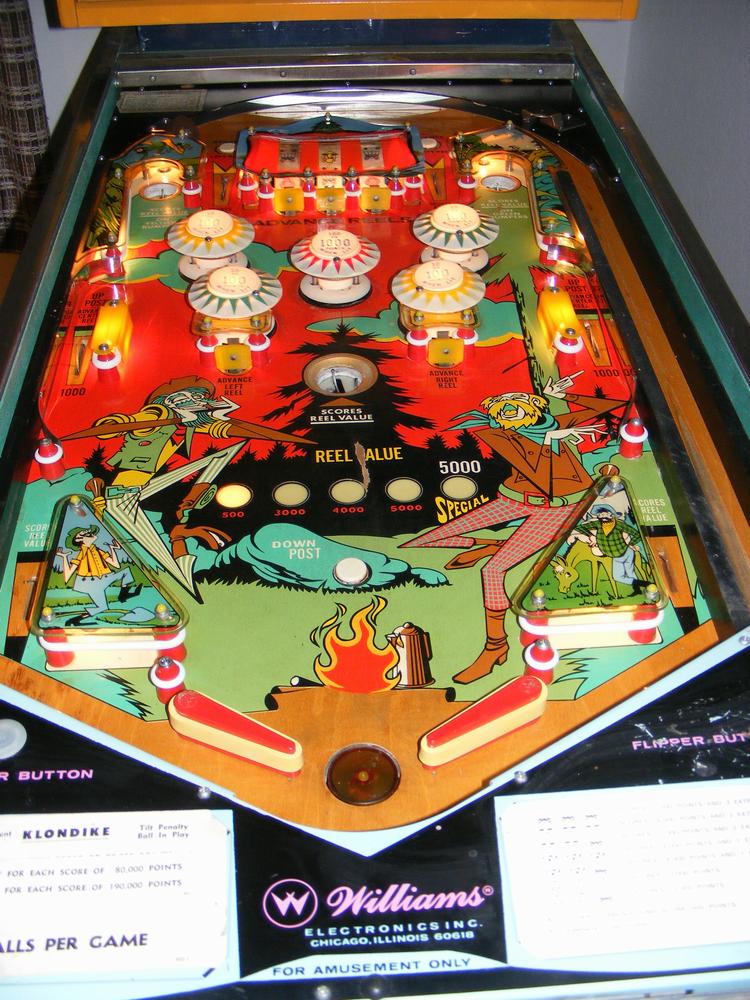
Now, it is time to work on the playfield.
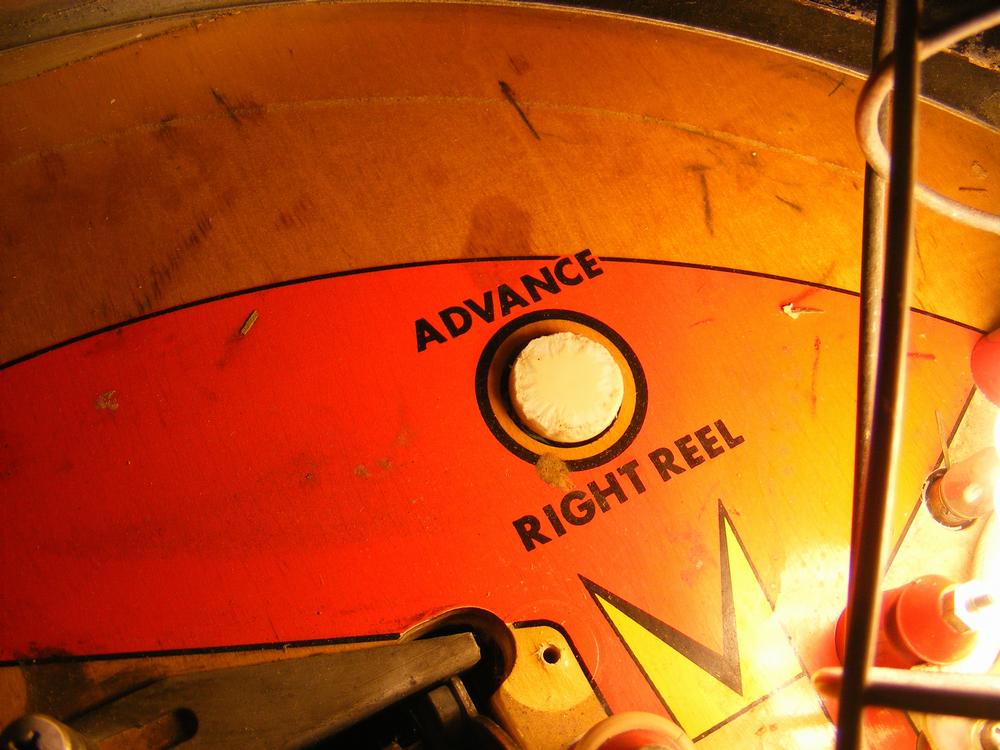
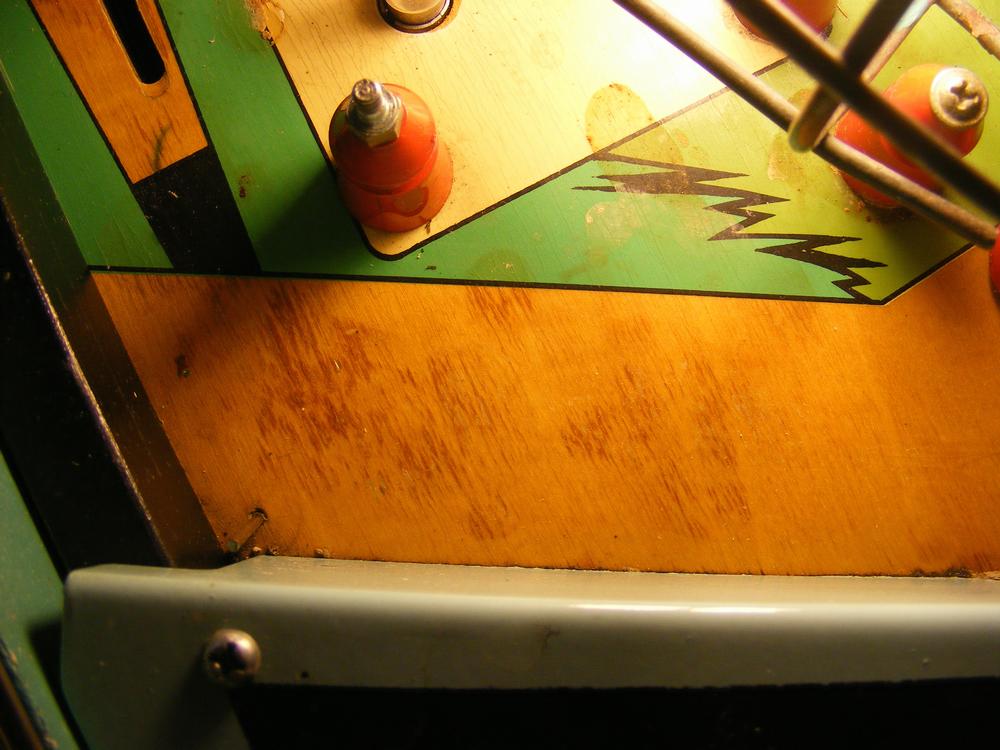
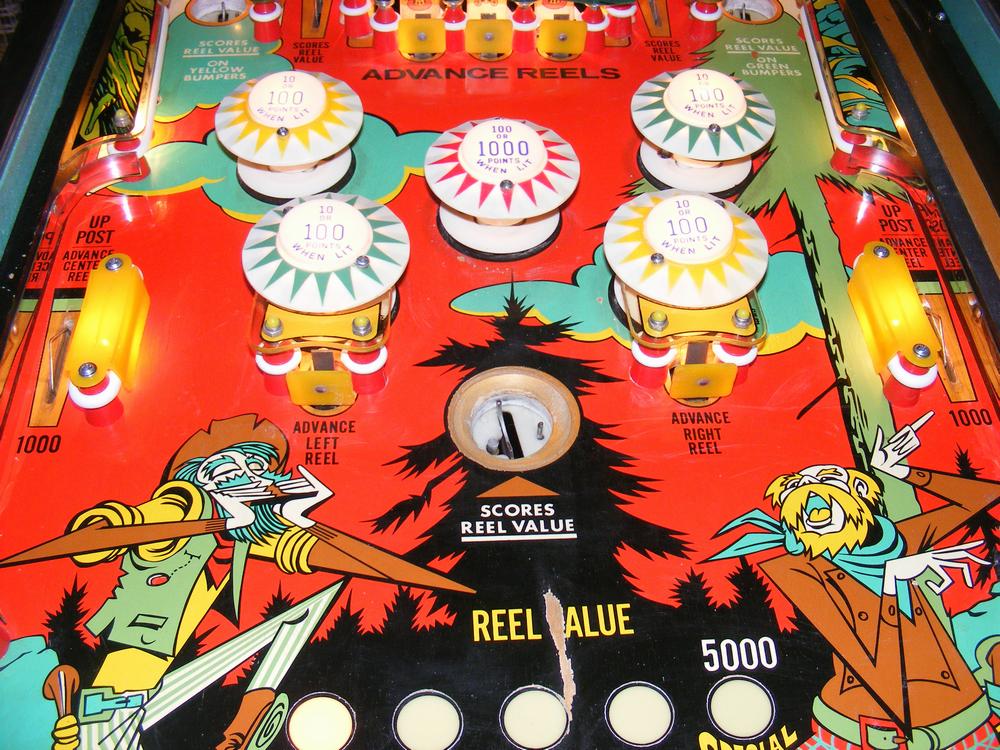
Unfortunately, our furry little friend visited the playfield too. It is well know that mouse urine on a lacquered playfield don't mix - or rather they mix too well. The urine seems to bond with the lacquer and is very difficult to remove. The upper and lower left playfield were the worst areas. Stranger still, our sharp toothed friend decided to gnaw on one of the playfield rollover buttons! Crazy!
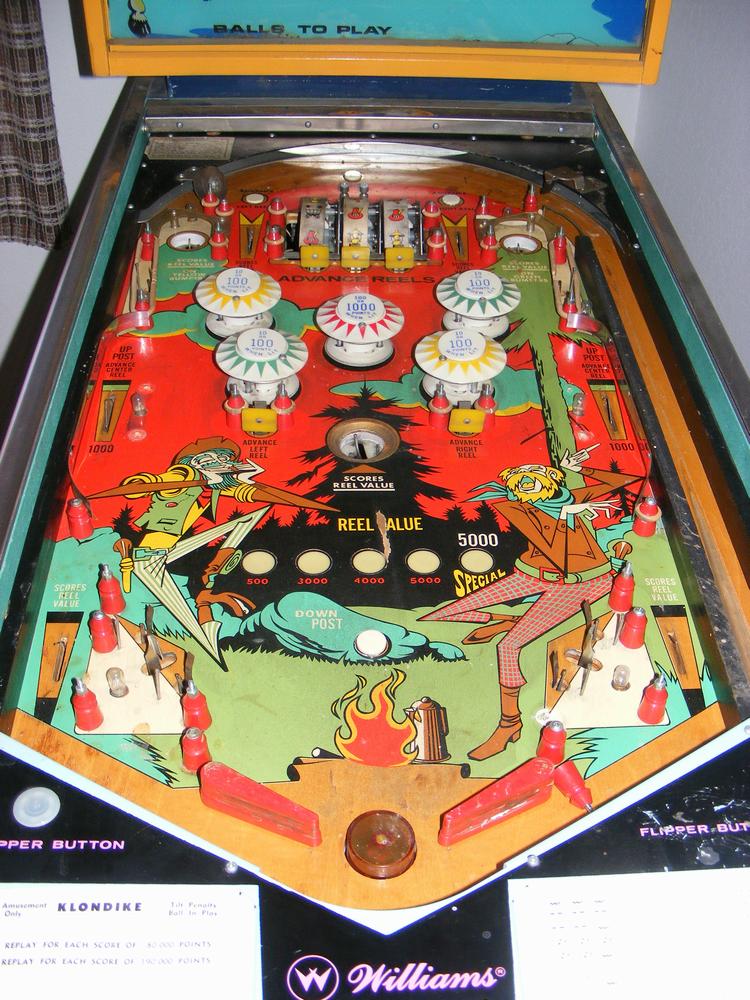
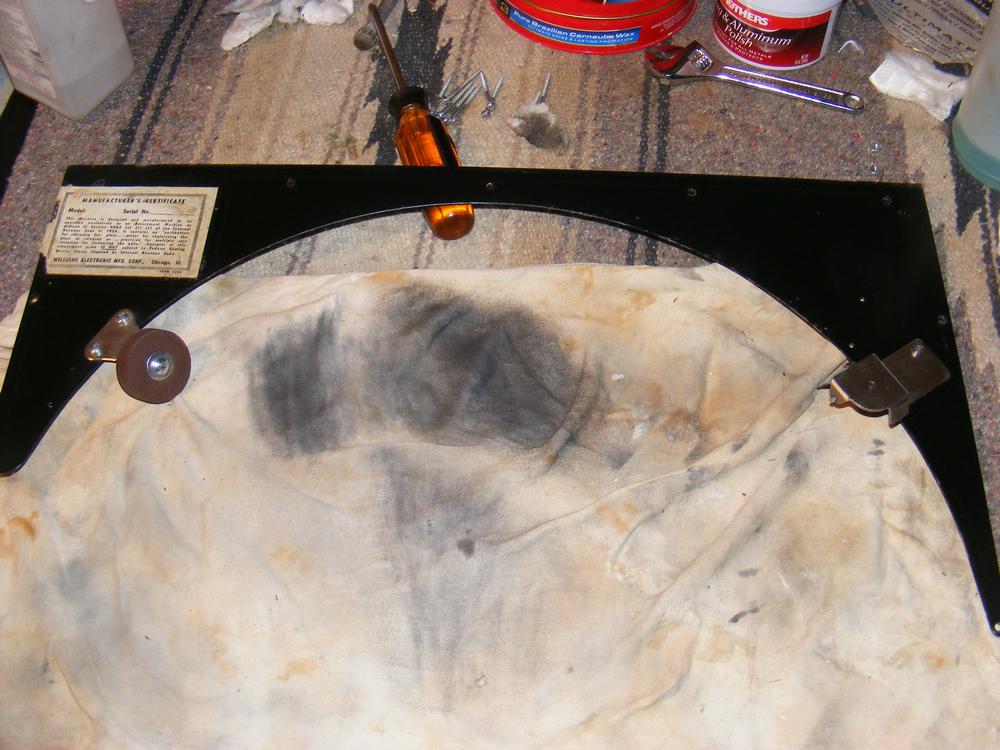
The upper arch was dirty and it looked like I would have to repaint it. But after a good cleaning, no new paint was needed. The brown rubber arch bumper was replaced. This rubber bumper is often overlooked when replacing playfield rubber rings. It doesn't need to be replaced very often, but the original bumper is what you will find on these old Projec Pins. The old rubber bumpers get stiff and hard. New rubber here helps the ball to bounce around more in the upper arch area.
I knew that cleaning the playfield would be challenging. Mouse urine requires a bit of elbow grease to remove. Except for a couple of spots where the urine got through to the playfield, it cleaned up nicely.
Replace all playfield insert lamps with new #44 lamps. DONE
Replace all playfield general illumination (GI) lamps with new #47 lamps. DONE
Replace five pop bumper lamps with new #47 lamps. DONE
Clean playfield and wax with Carnauba. DONE
Clean all playfield parts - flipper bats, posts, plastics, aprons etc. DONE
New rubber rings on playfield. DONE
Disassemble shooter rod, clean, replace sleeve, replace barrel spring and lightly lubricate with SuperLube. Reassemble and install. These old plastic shooter rod housings are often broken. A new metal one may be needed. DONE
Good news! I was surprised to find that the plastic shooter rod housing was intact. These usually break where the screws are screwed into the plastic housing.
A few playfield switches needed to be adjusted and that has been fixed. The weak flipper problem remains to be resolved. A quick look noted no obvious issues.
Replace all backbox lamps with new #47 lamps. DONE
Coat backglass with Triple Thick to prevent further flaking. DONE
The backglass has a little bit of flaking, especially at the bottom, but is in good shape. To prevent any further loss of ink from flaking, a couple coats of Krylon Triple Thick will be applied. Note that the windows on the backglass, the score reel windows and the credit wheel window, were covered with small pieces of cardboard to keep the Triple Thick off of the clear windows.
New locks on coin door and backbox door. f
Fix coin switches DONE
Clean outside of cabinet with blue window cleaner. DONE
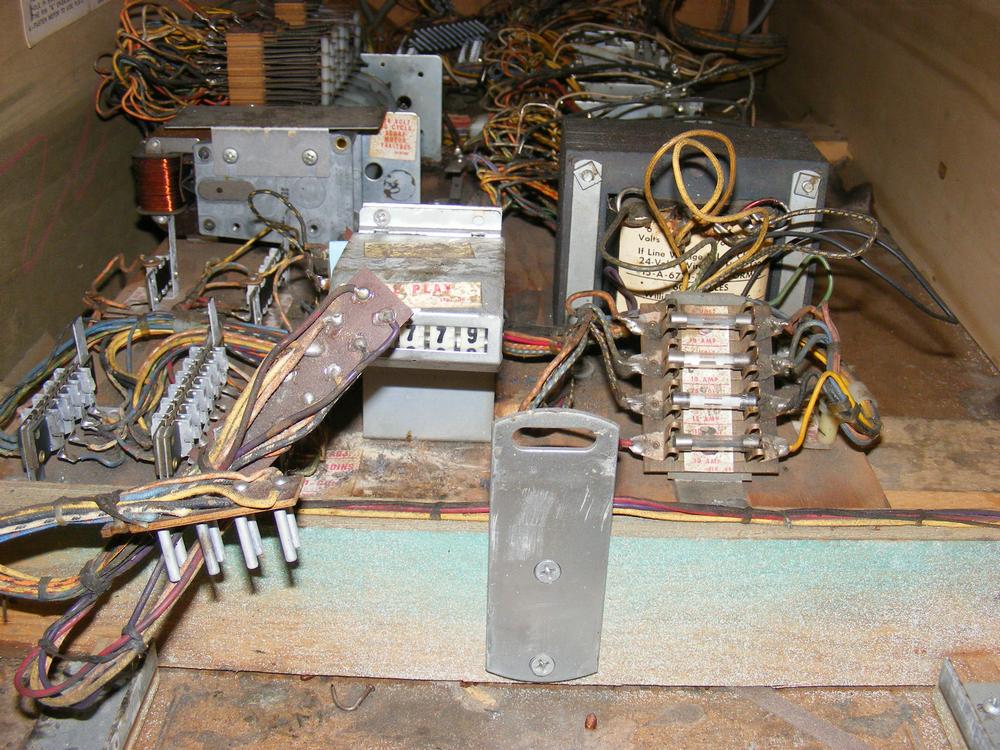
Remove fuses, one at a time, and check to see if Amperage is correct. Replace if not. Buff with Magic Brush the contact points on the fuse holders and fuses. Pinch fuse holders to tighten if fuses are loose. DONE
A new single-bit keyed backbox door lock was installed and the backbox door cleaned. The coin switches are always choggared up. I got one of them working.
The solution to the weak flipper problem was so simple and obvious that I am embarrassed to admit it. The End of Stroke (EOS) switch was cleaned and, I thought, properly adjusted. Even though the switch looked closed, it wasn't closed enough for current to flow. I adjusted the switch, properly this time, and the weak flipper problem was resolved.
The pop bumpers, all five of them, were sluggish and not up to my typical high standards. I knew the problem wasn't with the pop bumpers themselves, they had all been taken apart and thoroughly cleaned. I took a look at the fuse block, something I typically don't do, and found that the fuses were loose in the fuse holders. The line fuse, the most important, was dirty. I cleaned all of the fuses and used the magic brush to shine up the fuse holders, where contact with the fuse is made. I pinched the fuse holders together. This solved the loose fuse problem. After this work, the pop bumpers were much stronger and had the POP! that they should. In the future, not only will I be checking the fuses for proper values, but I will be working on the fuse holders to clean them up and tighten them up. This is something I should have learned years ago. Better late than never I guess.
The entire cabinet was cleaned with ammonia based blue window cleaner.
Several problems remain. One of them is a new problem. When the machine is tilted or at the end of the game the score motor continues to run when the ball reaches the outhole. The other problem is one of the wires to the coin lockout coil came loose. It looked like someone tried to attach it without solder.
The Klondike Project Pin work is really beginning to come together. It looks nice and clean and is finally beginning to play more like it did back in 1971 when it was made.
I left the front of the cabinet for last. It had a bad section of mouse mess on the left side. I used ammonia based blue glass cleaner to soak the area several times to remove the mess with paper towels. After an overnight drying, I painted the front of the cabinet with Krylon Almond paint.
As you can see, the front of the cabinet was a mess. Nothing clean and shiny here!
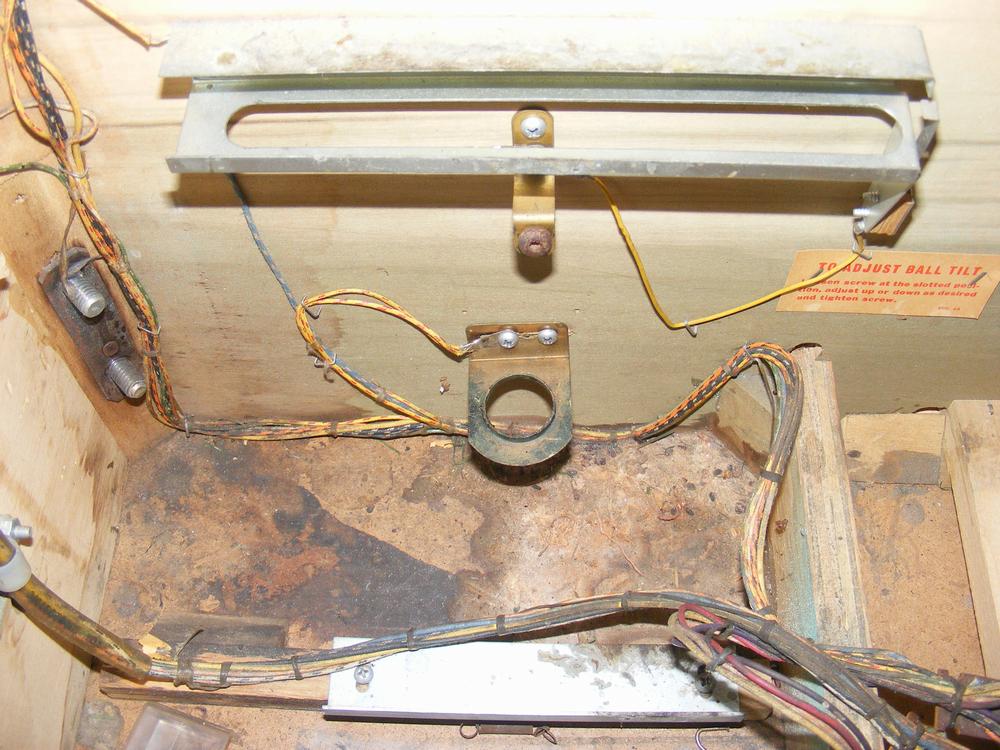
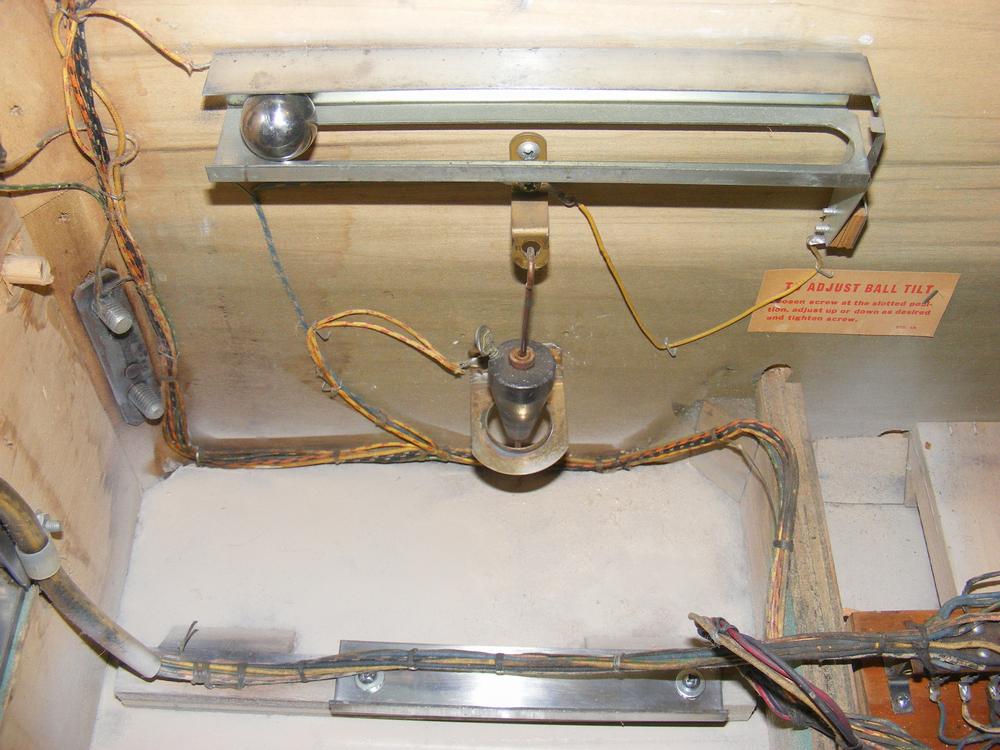
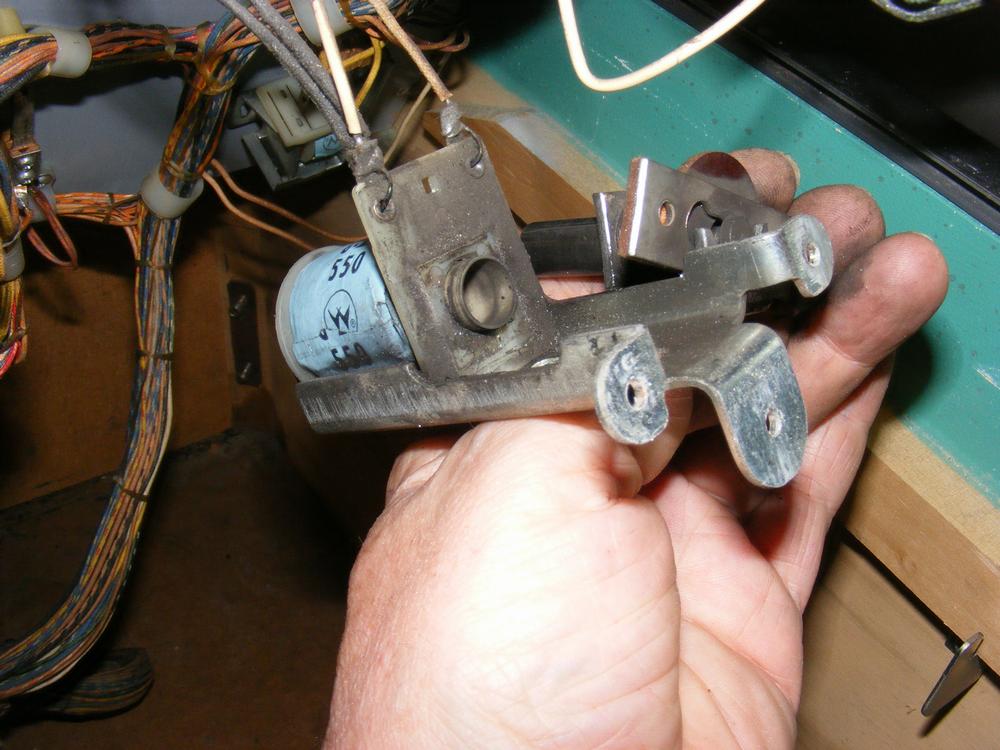
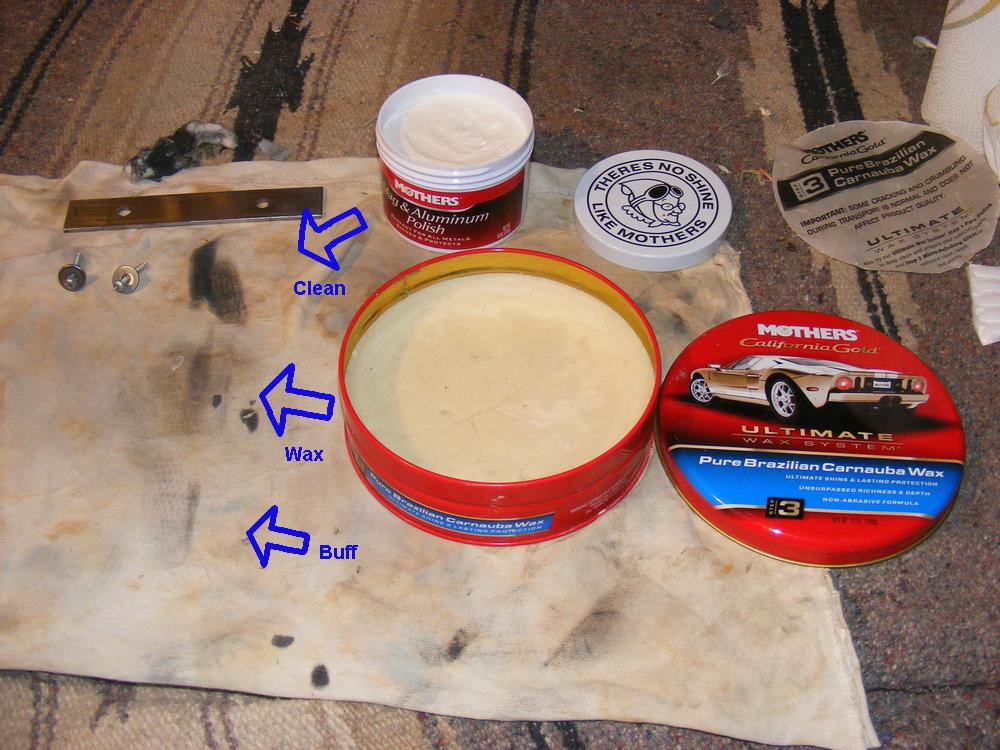
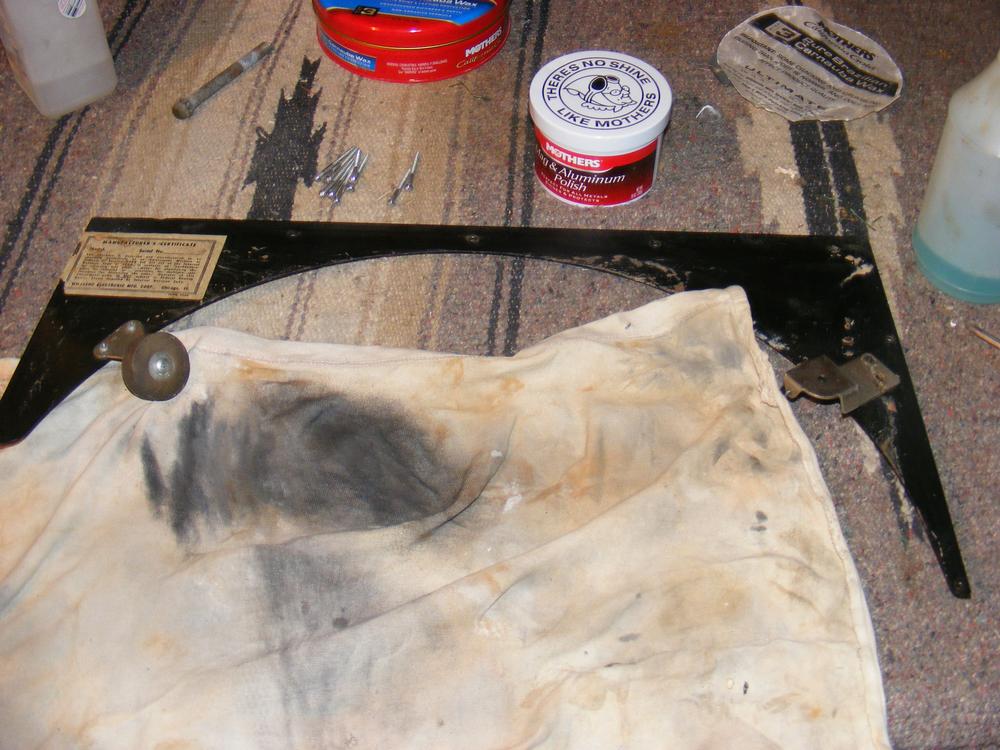
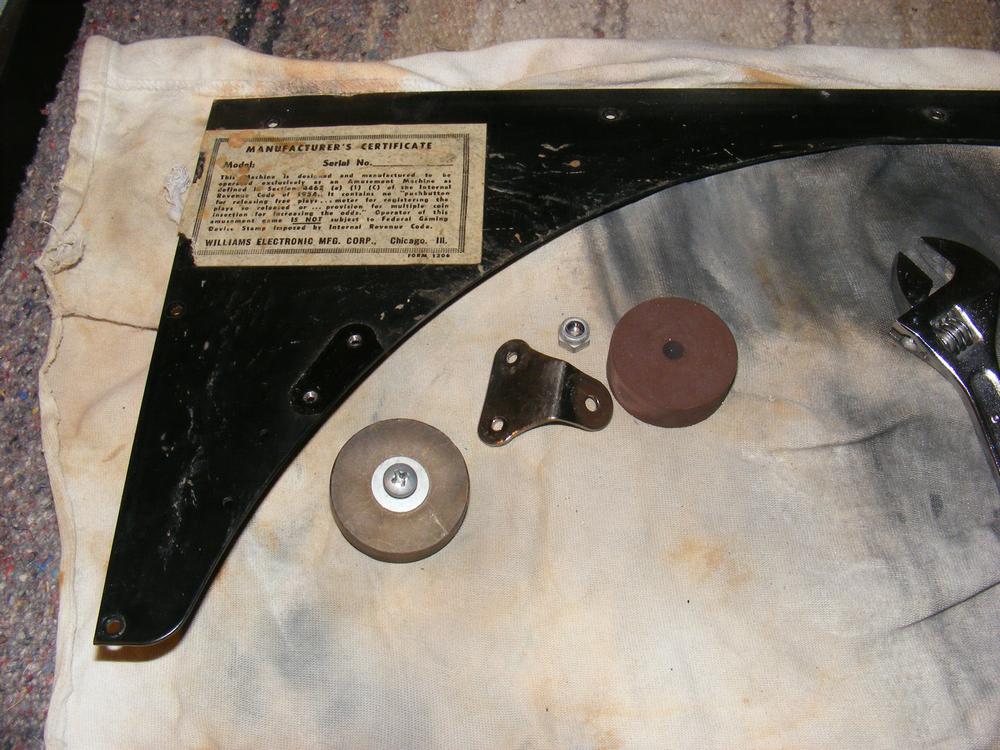
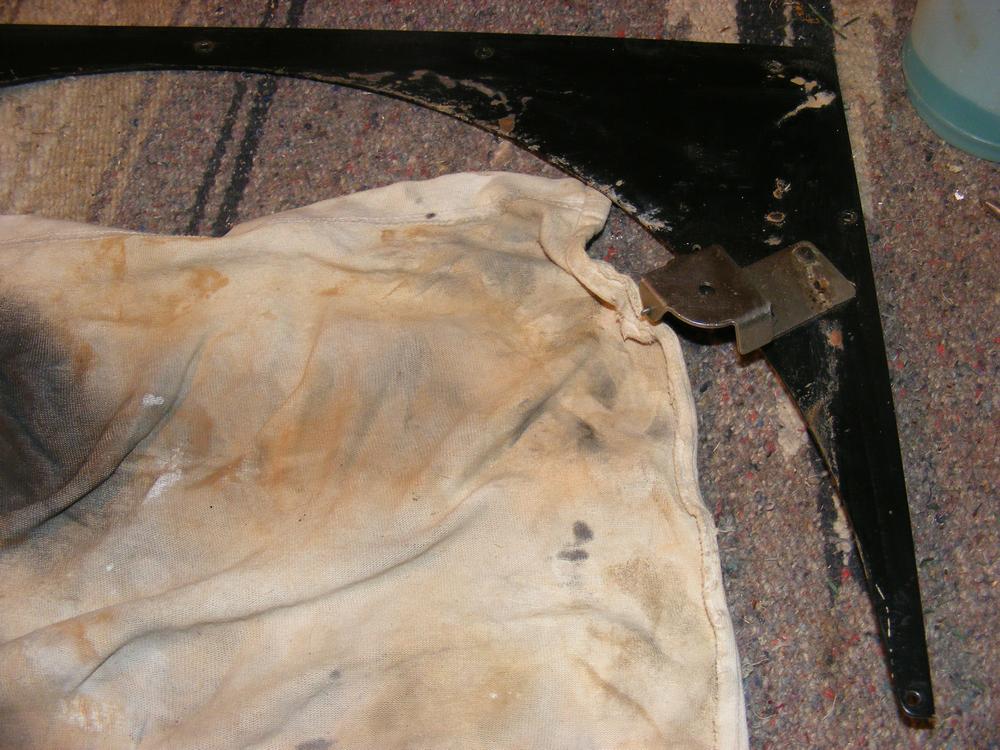
I had taken a lot of extra effort and time to shine up the ball-roll tilt and the plumb-bob tilt. I needed to use 500 grit sandpaper on the ball roll tilt and then I used Mothers Mag and Aluminum Polish to shine up the tilt assemblies.

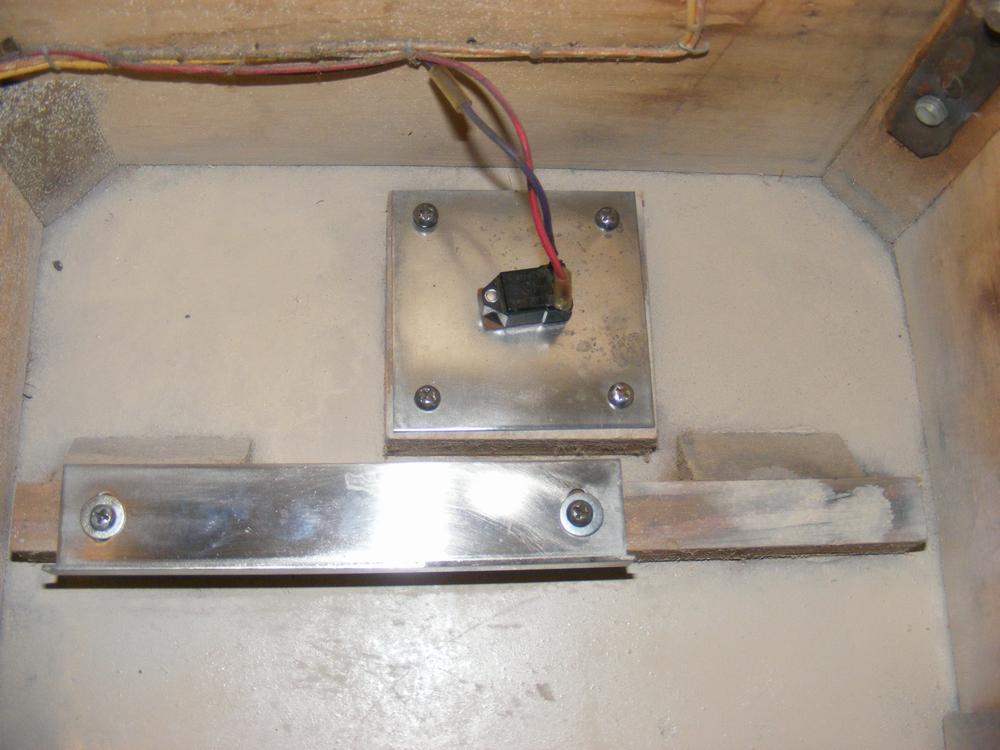
Again, I paid special attention to details and cleaned the power switch metal plate with 500 grit sandpaper and then Mothers Mag and Aluminum Polish. The metal in the front of the cabinet sure looks nice.
| Pecos SoftWareWorks Home | Contact Me | Terms of Use Rev 09/30/10 | Privacy Policy Rev 05/20/09 | About Us |
| Tweet |
|
||
|
© Copyright 2018 Alan Norton None of the content may be used or reproduced without written authorization from Alan Norton. |